Updated: May 2026
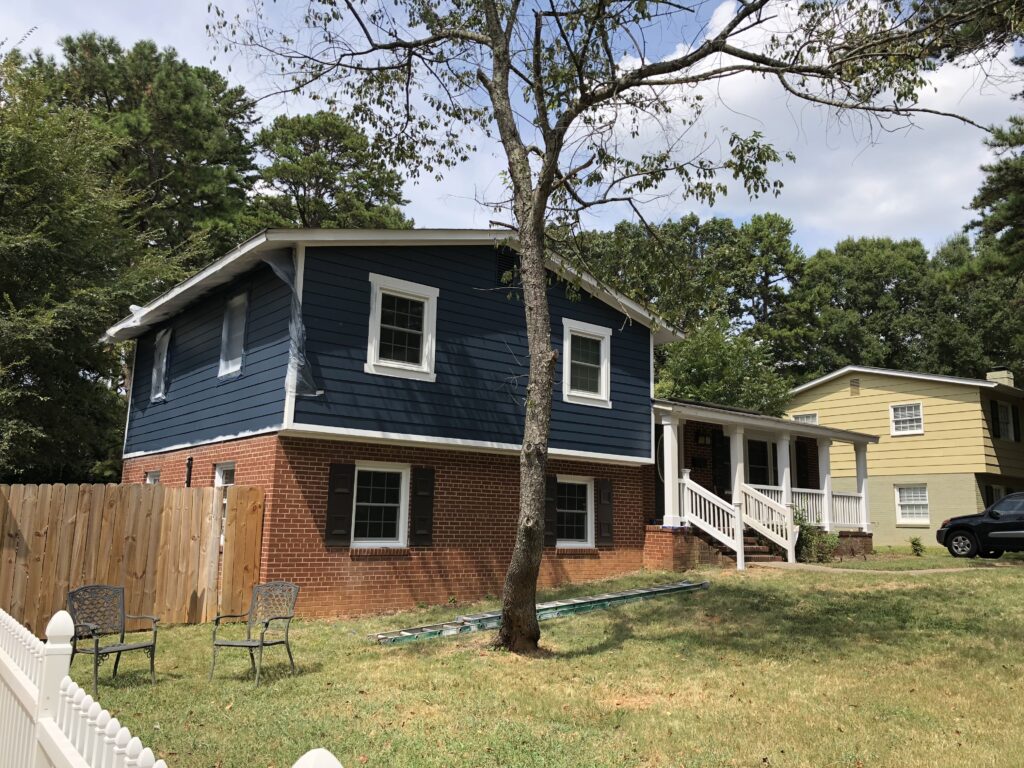
If your split-level’s exterior is looking rough — faded paint, warped boards, cracked masonite — new siding is the single biggest upgrade you can make for curb appeal and long-term protection. And fiber cement is, in my opinion, the best material available for the job.
I’ve done this myself. Full house, solo, start to finish. In this guide I’ll walk you through every step of a fiber cement siding install — from tearing off the old stuff to nailing the last plank. I’ll also cover what makes split-levels specifically tricky to side, how to cut around windows and doors cleanly, and what it actually costs in 2026.
If you’re still deciding between materials, I’ve included a full siding comparison table up front so you can make that call before diving in.
2026 Siding Comparison: Which Material Is Right for Your Split-Level?
Before committing to fiber cement, it’s worth knowing how it stacks up against the other options. Here’s where things stand in 2026:
| Siding Type | Cost / Sq Ft (2026) | Maintenance | Best For | Trend Rating |
|---|---|---|---|---|
| Vinyl | $4–$8 | Low | Budget makeovers | ⭐⭐⭐ |
| Fiber Cement | $6–$12 | Medium | Modern curb appeal | ⭐⭐⭐⭐ |
| Engineered Wood | $7–$13 | Medium | Natural wood look | ⭐⭐⭐⭐ |
| Stucco | $9–$15 | Low | Southwestern / Midcentury | ⭐⭐ |
| Composite Panels | $11–$22 | Low | Sleek, modern split-levels | ⭐⭐⭐⭐⭐ |
Cost per sq ft reflects material only. Labor adds $3–$7/sq ft if hiring out.
Fiber cement hits a sweet spot for most split-level owners: it looks genuinely good, holds up for decades, and a motivated DIYer can install it without a crew. That’s what this guide is focused on.
Why Fiber Cement Works So Well on Split-Level Homes
Most siding guides are written for a simple ranch or colonial — one continuous wall, straightforward top-to-bottom install. Split-levels are different, and it’s worth understanding why before you start.
A split-level exterior typically has two or three distinct facade sections at different heights, often with a roofline breaking between them. This means you’re not running siding continuously from foundation to soffit — you’re working in separate zones, each with its own starting point, its own level line, and its own set of cuts around windows and trim.
Fiber cement handles this well for a few reasons:
- It comes in 12-foot planks, which are long enough to span most sections without mid-wall seams on typical split-level widths.
- The level breaks become design opportunities. A lot of split-level owners use different siding profiles or colors on each level — horizontal lap on the main level, board and batten or vertical panels on the lower level. Fiber cement supports all of these in the same product line.
- It’s dimensionally stable. Unlike wood or engineered wood, fiber cement doesn’t expand and contract dramatically with moisture changes. At the level transitions where flashing and caulk do a lot of work, that stability matters.
Trending in 2026: color blocking at the level break — a darker tone on the lower level (charcoal, deep navy, or black) with a lighter neutral on the upper. It emphasizes the split-level’s geometry instead of trying to hide it, and it looks intentional rather than dated.

Giveaways, Ebook, and Forum coming soon. Be the first to know about new content!
What Is Fiber Cement Siding?
Fiber cement is a composite material made from cement, sand, water, and cellulose fibers. That combination produces a panel that’s hard, dimensionally stable, and highly resistant to rot, fire, insects, and impact. It’s also one of the best surfaces for holding exterior paint — the porous texture gives paint something to grip, and UV fade resistance on fiber cement is measurably better than on vinyl or wood.
The most common form is lap siding — planks that are typically 12 feet long and 7–8 inches wide, installed horizontally with each course overlapping the one below. Other formats include:
- Shingles / shake — for a more traditional or Cape Cod look
- Vertical / board and batten — popular on lower levels of split-levels
- 4×8 panels — faster to install on large flat sections, covered at the end of this guide
- Trim boards and soffit panels — same material, used to finish corners, windows, and overhangs
James Hardie (HardiePlank) is the dominant brand and what most people picture when they hear “fiber cement siding.” It’s excellent. That said, I used Nichiha on my own house and came out about 30% cheaper with equivalent quality — worth asking your local building supply about alternatives before defaulting to Hardie.
How Much Does Fiber Cement Siding Cost?
Individual planks typically run $9–$16 per board in 2026 depending on profile and brand. You’ll generally get better pricing at a local building supply or lumber yard than at big-box retail — call around before ordering.
How Much Siding Do I Need?
Here’s the math:
- Measure the height and width of every wall section you’re siding. Multiply to get square footage. Round up.
- Subtract the square footage of all windows and doors (measure from the interior for accuracy).
- Add 10% for waste — more if you have a lot of angles, dormers, or complex cuts. Professionals sometimes say 5% is enough; if this is your first siding job, use 10%.
Standard 12-foot lap boards at 7.5″ wide yield about 7.5 sq ft per board (accounting for the overlap). If math isn’t your thing, use an online siding calculator — plug in your measurements and it does the work.
Tools You’ll Need
The good news: you don’t need a massive tool arsenal. The bad news: the one tool you absolutely cannot skip — the gecko clamps — isn’t something most people already own. Get them before you start.
The One Non-Negotiable Tool: Gecko Siding Clamps
A set of Gecko Clamps is non-negotiable whether you're installing siding by yourself, or with help. These will pay for themselves within the first hour.

Gecko clamps hook onto the bottom edge of the board you just installed and hold the next board at a consistent reveal while you nail it. Without them, installing siding solo means constantly fighting boards that want to slide or shift before you can get a nail in. With them, you’re working at a real pace. If you have a second person helping, get two sets so you can work two areas simultaneously.
Full Tool List
-
Check Price
A set of Gecko Clamps is non-negotiable whether you're installing siding by yourself, or with help. These will pay for themselves within the first hour.
We earn a commission if you make a purchase, at no additional cost to you.
-
 Check Price
Much more reliable for exterior projects than a finish nailer. Use nails that have a head, and make sure theyre rated for exterior applications.
We earn a commission if you make a purchase, at no additional cost to you.
-
 Check Price
Craftsman has my favorite tape measures because they don't lose their strength at long distances.
We earn a commission if you make a purchase, at no additional cost to you.
-
 Check Price
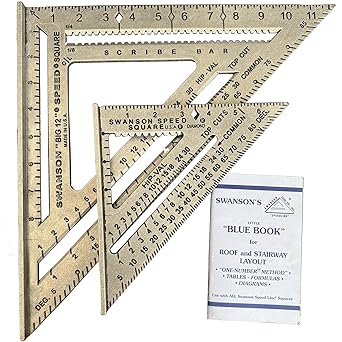
Honestly, just get a speed square, you're going to need it for a project at some point.
We earn a commission if you make a purchase, at no additional cost to you.
-
 Check Price
Often skipped. Never should be. More on this below.
We earn a commission if you make a purchase, at no additional cost to you.
-
 Check Price
I purchased a 6 foot scaffolding unit like this one. It’s not totally necessary however it will make work a lot easier once you’re above your head. After about 15 feet off the ground I had to use ground ladders. The scaffolding is well worth the money. Plus harbor freight usually offers 20% off which takes their scaffolding unit to around $150.
We earn a commission if you make a purchase, at no additional cost to you.
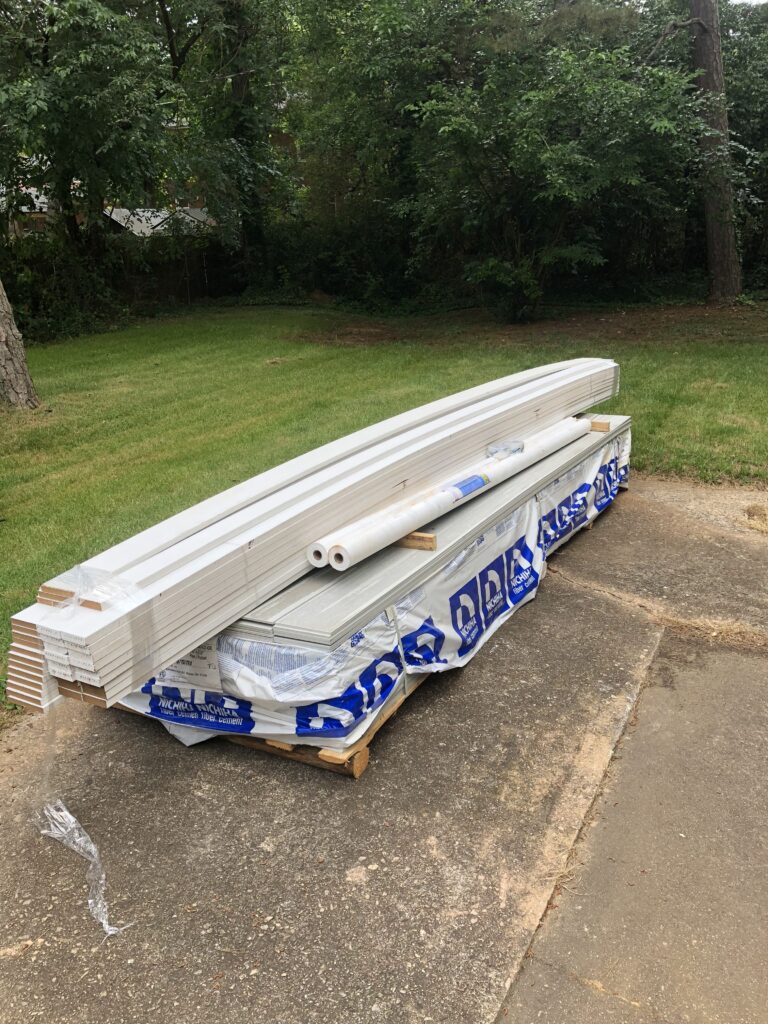
Material List
- Fiber cement lap siding — Quantity per your calculation above. Ask about Nichiha or other brands alongside HardiePlank for pricing.
- Housewrap — Comes in 9-foot rolls. You’ll shingle it bottom-up so water can’t run behind a lower layer.
- Corner trim and window trim — Fiber cement or PVC. If you’re updating the exterior window trim at the same time, now is the time to do it — the siding will butt right up to it.
- Siding nails — Standard is 2.5″ hot-dipped galvanized. Ask your supplier if you’re unsure for your specific product.
- Trim nails — Longer and thicker than siding nails.
- Flashing tape — For window and door rough openings. Don’t skip this.
- Exterior caulk — Paintable, high-quality. You’ll use more than you think.
How to Install Fiber Cement Siding: Step by Step
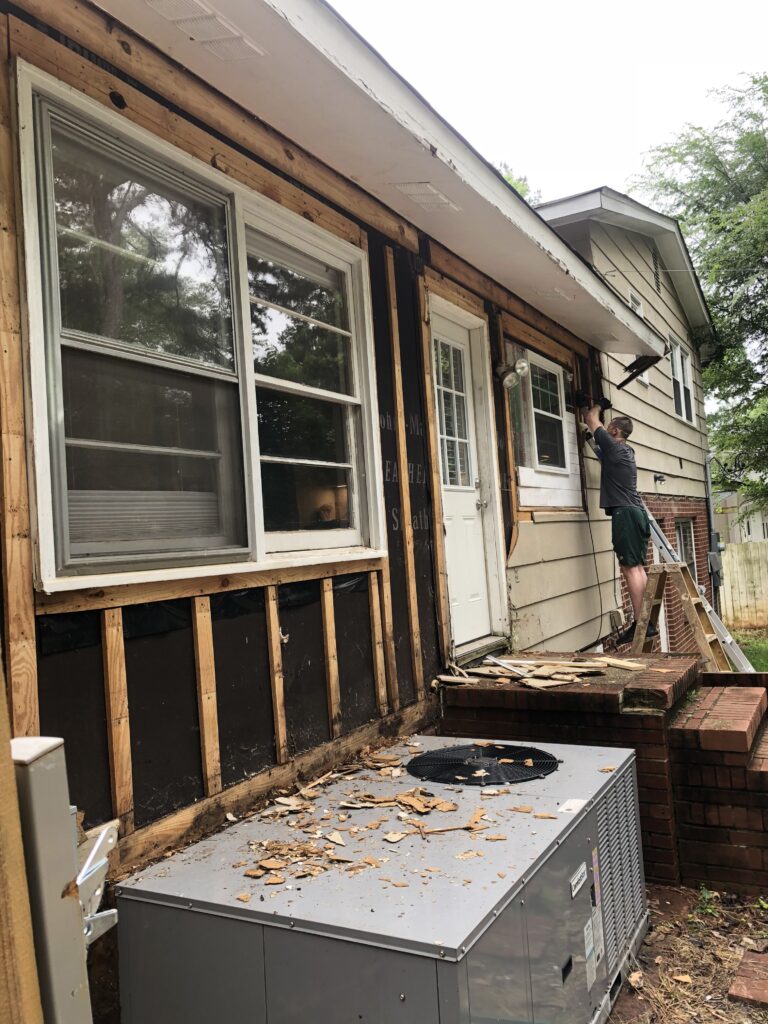
Step 1: Remove the Old Siding
I’m not going to sugarcoat it — demo is miserable. On my house it was Masonite siding that had the structural integrity of wet cardboard. Wear a mask, gloves, and a long-sleeve shirt. Some old siding — particularly on homes built before 1980 — can contain asbestos. If you’re not sure what you have, get it tested before you start swinging a pry bar.
Start at the highest point you can reach and work top-down. Remove every nail as you go — finding a missed nail after you’ve set a new plank into place is a special kind of frustrating.
If the scope of your project justifies it, rent a dumpster. A construction dumpster typically runs $400–$600 for a two-week rental in 2026. Demo a second project while you have it — dumpsters are one of those things you always wish you’d gotten sooner.
Step 2: Inspect the Sheathing
This is a step most guides skip, and it’s important. Once the old siding is off, look carefully at the sheathing underneath before anything new goes up. Soft spots, dark staining, mold, or crumbling OSB need to be addressed now. Covering a moisture problem with new siding doesn’t fix it — it just hides it until it’s worse and more expensive.
Replace any damaged sheathing panels before moving on. This is also your chance to add rigid foam insulation if your energy bills have been high — it’s dramatically easier to add it at this stage than any other.
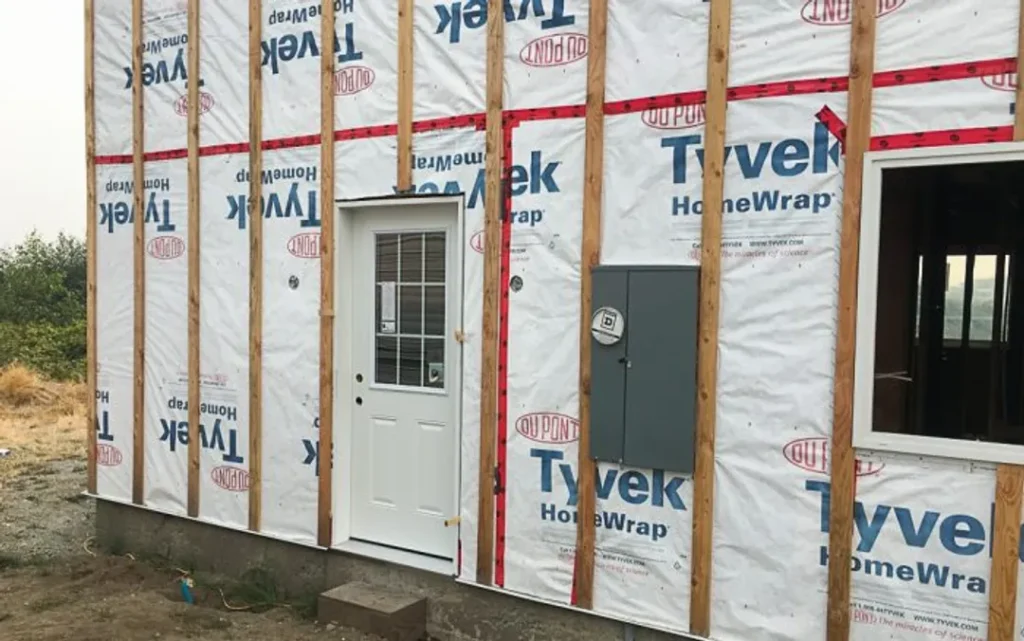
Step 3: Install Housewrap
I got lucky, after tearing off the siding, I found out my house was built with a black weather membrane, and then 1 inch rips of wood on top of that, marking the studs. Unfortunately, yours may or may not be set up like this.
Housewrap is your last line of defense against water that gets behind the siding. Install it starting at the bottom and work up, overlapping each row over the one below it (shingling) so water sheds down and out. Most rolls are 9 feet tall and work well for single-story sections.
Mark your studs before the housewrap goes up. Find each stud, snap a chalk line from top to bottom, and mark it clearly. You’ll be nailing siding into these lines for days — hitting a stud every time is critical, both for holding power and to avoid punching nails into plumbing or electrical lines.
Tape all seams in the housewrap with compatible flashing tape. Pay extra attention around window and door openings — wrap the flashing tape into the rough opening and lap it over the housewrap face. This is where water infiltration starts on most homes.
Step 4: Install Corner and Window Trim
All trim goes up before siding. The siding butts to the trim — not the other way around.
Corner trim is two boards: one flush with the corner face, and the second overlapping it on the perpendicular side. Don’t stress about the seam between them — caulk handles it. For window trim, install the vertical side boards first, then the bottom, then the top with its overhang. Full details on that process are in the exterior window trim guide.
Use PVC or composite trim boards, not pressure-treated wood. Wood trim is where rot starts on older homes, and you don’t want to be back here in 8 years replacing it.
Step 5: Install the First Row of Siding
A set of Gecko Clamps is non-negotiable whether you're installing siding by yourself, or with help. These will pay for themselves within the first hour.
The first board is the hardest part of the whole job, especially solo. Here’s the trick: cut a 1-inch wide strip off a siding board and nail it along the very bottom of the wall, running the full length of your starting section. This starter strip kicks the bottom of your first full board out at the same angle as every board above it. Without it, the bottom course sits flat against the wall and looks wrong.
Once the starter strip is in place, set your first full board on top of it and check for level. Adjust until it’s right, then nail it at every stud. These boards are less rigid than they look — don’t let them span more than 16 inches without hitting a stud or they’ll flex and crack over time.
Step 6: Install the Remaining Courses
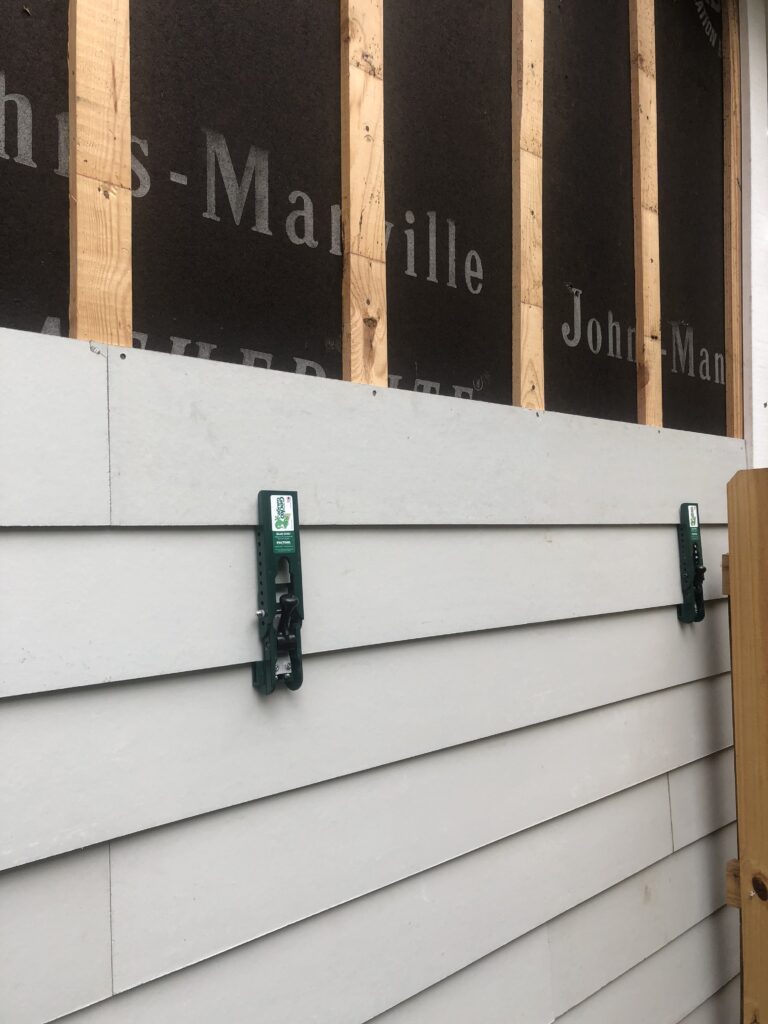
Once the first row is in, things get more rhythmic. Set your gecko clamps to your desired reveal — most homeowners go with 7.25″–7.5″, which gives a clean look without wasting material. Both clamps must be set to the same measurement or your rows will drift out of level.
For runs longer than 12 feet, you’ll need to butt two boards together at a stud. Leave the joint as tight as possible — unlike real wood, quality fiber cement won’t swell enough to cause problems, and a tight joint is easier for painters to caulk cleanly.
At the level breaks on a split-level, treat each section independently. Snap a new level line at the start of each zone and establish a new first course. The transition between levels is usually covered by a horizontal band or J-channel — plan how you want to handle that detail before you get there, not when you’re on a ladder holding a 12-foot board.
Keep going. You’ll find a rhythm. Progress is visible quickly once you’re past the first few courses, which helps on the days when the project feels endless.
How to Cut Fiber Cement Siding
You have a few options, each with tradeoffs:
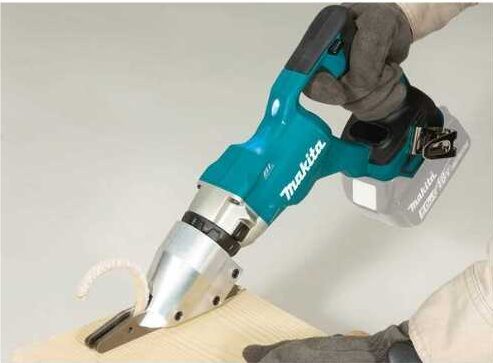
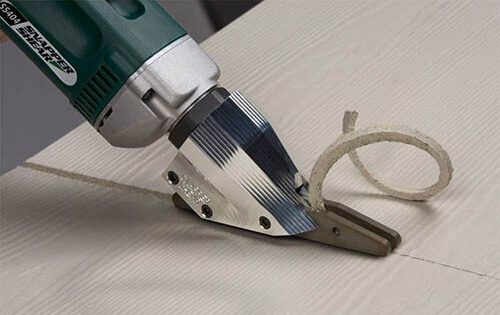
Fiber cement shears (electric) are my go-to for most cuts. They follow your hand like scissors, which makes navigating notches around windows and doors natural and precise. The biggest advantage: almost no dust. Fiber cement dust contains respirable silica — not something you want filling the air around you all day.
A siding guillotine is the fastest option for straight crosscuts. No dust, no electricity required, and you can run through straight cuts very quickly. Not ideal for notches or curves.
A circular saw with a carbide-tipped fiber cement blade works but creates significant dust. If you go this route, wear your respirator without exception and cut with the blade spinning away from you when possible to direct dust downward.
For cuts around windows and door frames: measure carefully, mark with a pencil and framing square, and cut as tight as you can to the trim line. Painters will caulk the gap, but a tight fit looks more professional and gives the caulk less work to do.
How to Paint Fiber Cement Siding
Most fiber cement siding ships primed but not painted. Don’t leave it unfinished for long — bare primer is not a long-term weather barrier. Paint within 180 days of install (check your manufacturer’s spec).
What Paint to Use
Use a 100% acrylic exterior paint formulated for fiber cement or masonry. Sherwin-Williams Emerald Exterior and Benjamin Moore Aura Exterior are both excellent choices — the premium cost is worth it here because the siding’s texture and absorbency mean you’ll use more paint, and quality paint holds color and adhesion significantly longer.
Apply two coats minimum. The first coat soaks into the primer and seals the surface. The second coat is what you’ll actually see and what protects the material. Back-roll if you’re spraying to work the paint into the texture.
Trending Colors for Split-Levels in 2026
- Charcoal / deep gray — Clean, modern, pairs well with white trim
- Warm black — Bold but not harsh; very popular on lower-level accent sections
- Sage green — Natural, increasingly common as an alternative to gray
- Warm greige (gray-beige) — Safe, broadly appealing, works on most architectural styles
- Two-tone with color blocking — Different colors on each level of the split; emphasizes the architecture rather than fighting it
For a deeper guide on choosing a color scheme that works, see the exterior color scheme guide.
Cost to Paint Fiber Cement Siding (2026)
- Professional full exterior paint: $7,000–$14,000+ depending on home size
- Trim and accent sections only: $1,200–$2,500
- DIY material cost: $300–$600 in primer and paint for a typical split-level
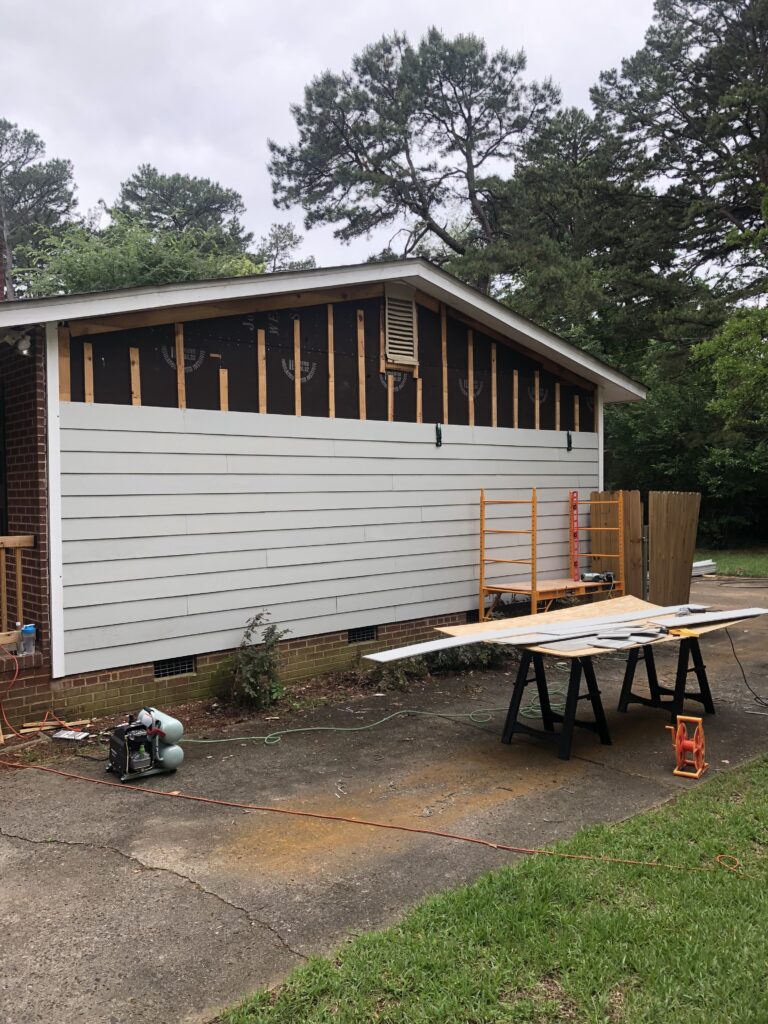
How to Install 4×8 Hardie Board Siding Panels
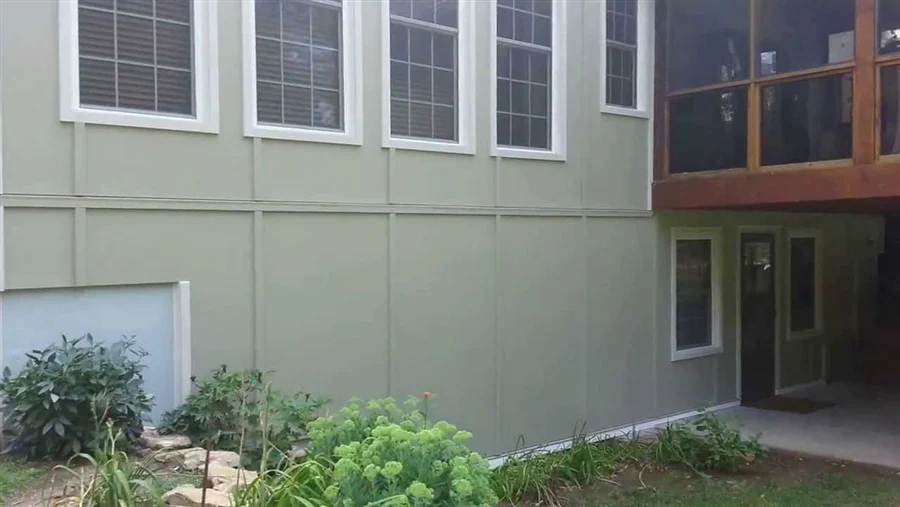
Most fiber cement manufacturers offer 4×8 sheet panels in addition to lap siding. These are commonly used for vertical siding sections — popular on the lower level of split-levels for contrast — and for large flat wall areas where running individual lap boards would mean a lot of seams.
The install process shares a lot with lap siding but has a few key differences:
- These panels are heavy. A 4×8 sheet of fiber cement weighs 45–55 lbs depending on thickness. Have a helper for this, or at minimum a good panel lift setup on your sawhorses.
- Work bottom to top, so each upper row has the row below it to rest against while you position it.
- Seams need to land on studs. Plan your layout before you start cutting so vertical seams fall at stud locations.
- Cover seams with trim. Unlike lap siding where the overlap handles water management, panel seams need a trim board or Z-flashing over them. Explore what detail you want before starting — there are several approaches and the right one depends on the look you’re going for.
- Leave a 1/8″ gap between panels and caulk it. Unlike with lap boards, panel edges are more exposed and the gap gives the caulk room to work.
Pro Tips for a Better Install
- Stage your materials the night before. Stack boards near each work zone so you’re not walking to the delivery pile for every course. This sounds minor and saves hours.
- Cut in batches. If you have three windows the same size, measure them all, mark the cuts on a stack of boards, and run them all through in one session. Context-switching between measuring and cutting kills pace.
- Never nail closer than 3/4″ from the board edge. Fiber cement will crack. Pre-drill if you’re working near an edge.
- Nail at the top of the nailing slot, not the middle. This allows the board to move slightly with temperature changes without buckling.
- At inside corners, butt boards to a corner trim piece — don’t try to miter them. Mitered fiber cement corners are very difficult to execute well and fail faster than trim-covered joints.
- Snap a chalk line every 4–5 courses to verify you’re still level. Boards have a way of drifting slightly over long runs — catching it early is much easier than correcting 10 courses later.
- Caulk every penetration and butt joint before painters arrive. Don’t assume the painting crew will do thorough caulking. Do it yourself and let their caulk be extra insurance.
Frequently Asked Questions
Can I install fiber cement siding by myself?
Yes — I did it solo on a full split-level. The gecko clamps are what make it possible. Without them, holding a 12-foot board level while nailing it is a two-person job. With them, one person can work at a real pace. Budget more time than you think: a full house typically takes 2–4 weekends depending on complexity and how many windows you’re working around.
Do I need to remove old siding before installing fiber cement?
In most cases, yes. Installing over existing siding adds thickness that can cause problems at windows, doors, and trim transitions, and it prevents you from inspecting and repairing the sheathing underneath. There are situations where installing over old siding is acceptable — consult a local contractor if you’re considering it — but tearing off and starting clean is almost always the better call.
How long does fiber cement siding last?
Properly installed and painted fiber cement siding should last 30–50 years. The main maintenance requirement is repainting — expect to repaint every 10–15 years depending on sun exposure and climate. The material itself doesn’t rot, warp, or attract insects, so the lifespan is largely determined by how well the paint coat is maintained.
What’s the difference between HardiePlank and other fiber cement brands?
HardiePlank is the market leader and has an excellent reputation — the specs are well-documented and contractors are very familiar with it. Other brands like Nichiha are manufactured to similar standards and can be meaningfully cheaper. I used Nichiha on my own house and came out about 30% ahead on material cost. Ask your local building supply what they carry and get prices on both before deciding.
Do I need a permit to reside my house?
In most jurisdictions, yes — replacing the exterior cladding on a house requires a building permit. Requirements vary by location. Check with your local building department before starting. The permit process also typically requires an inspection, which is actually useful — having an inspector sign off on your housewrap and flashing before the siding goes over it is good peace of mind.
Ready to Get Started?
Residing a split-level is a serious project, but it’s completely doable for a motivated DIYer with the right tools and a realistic time budget. The payoff — a house that looks completely different from the street and a building envelope that will hold up for decades — is one of the best returns you can get on a renovation dollar.
Get the gecko clamps. Have your materials delivered. Mark your studs before the housewrap goes up. Take it one section at a time.
For a full breakdown of what this project costs alongside every other exterior upgrade, see the split-level renovation cost guide. And if you’re updating your window trim at the same time as the siding — which you should be — the exterior window trim guide covers that install start to finish.
Questions about a specific situation on your house? Drop them in the comments.

Max
Max Lowrie, founder of MySplitLevel.com® and author of The Live In Flip© bought his first split level house in 2016. During a lengthy renovation, Max noticed that there was little useful content online specific to split-level homes. Max now devotes his time to share his knowledge hoping to help homeowners avoid unnecessary mistakes, and provide a blue print for split-level owners nationwide.
Giveaways, Ebook, and Forum coming soon. Be the first to know about new content!