Updated May 2026
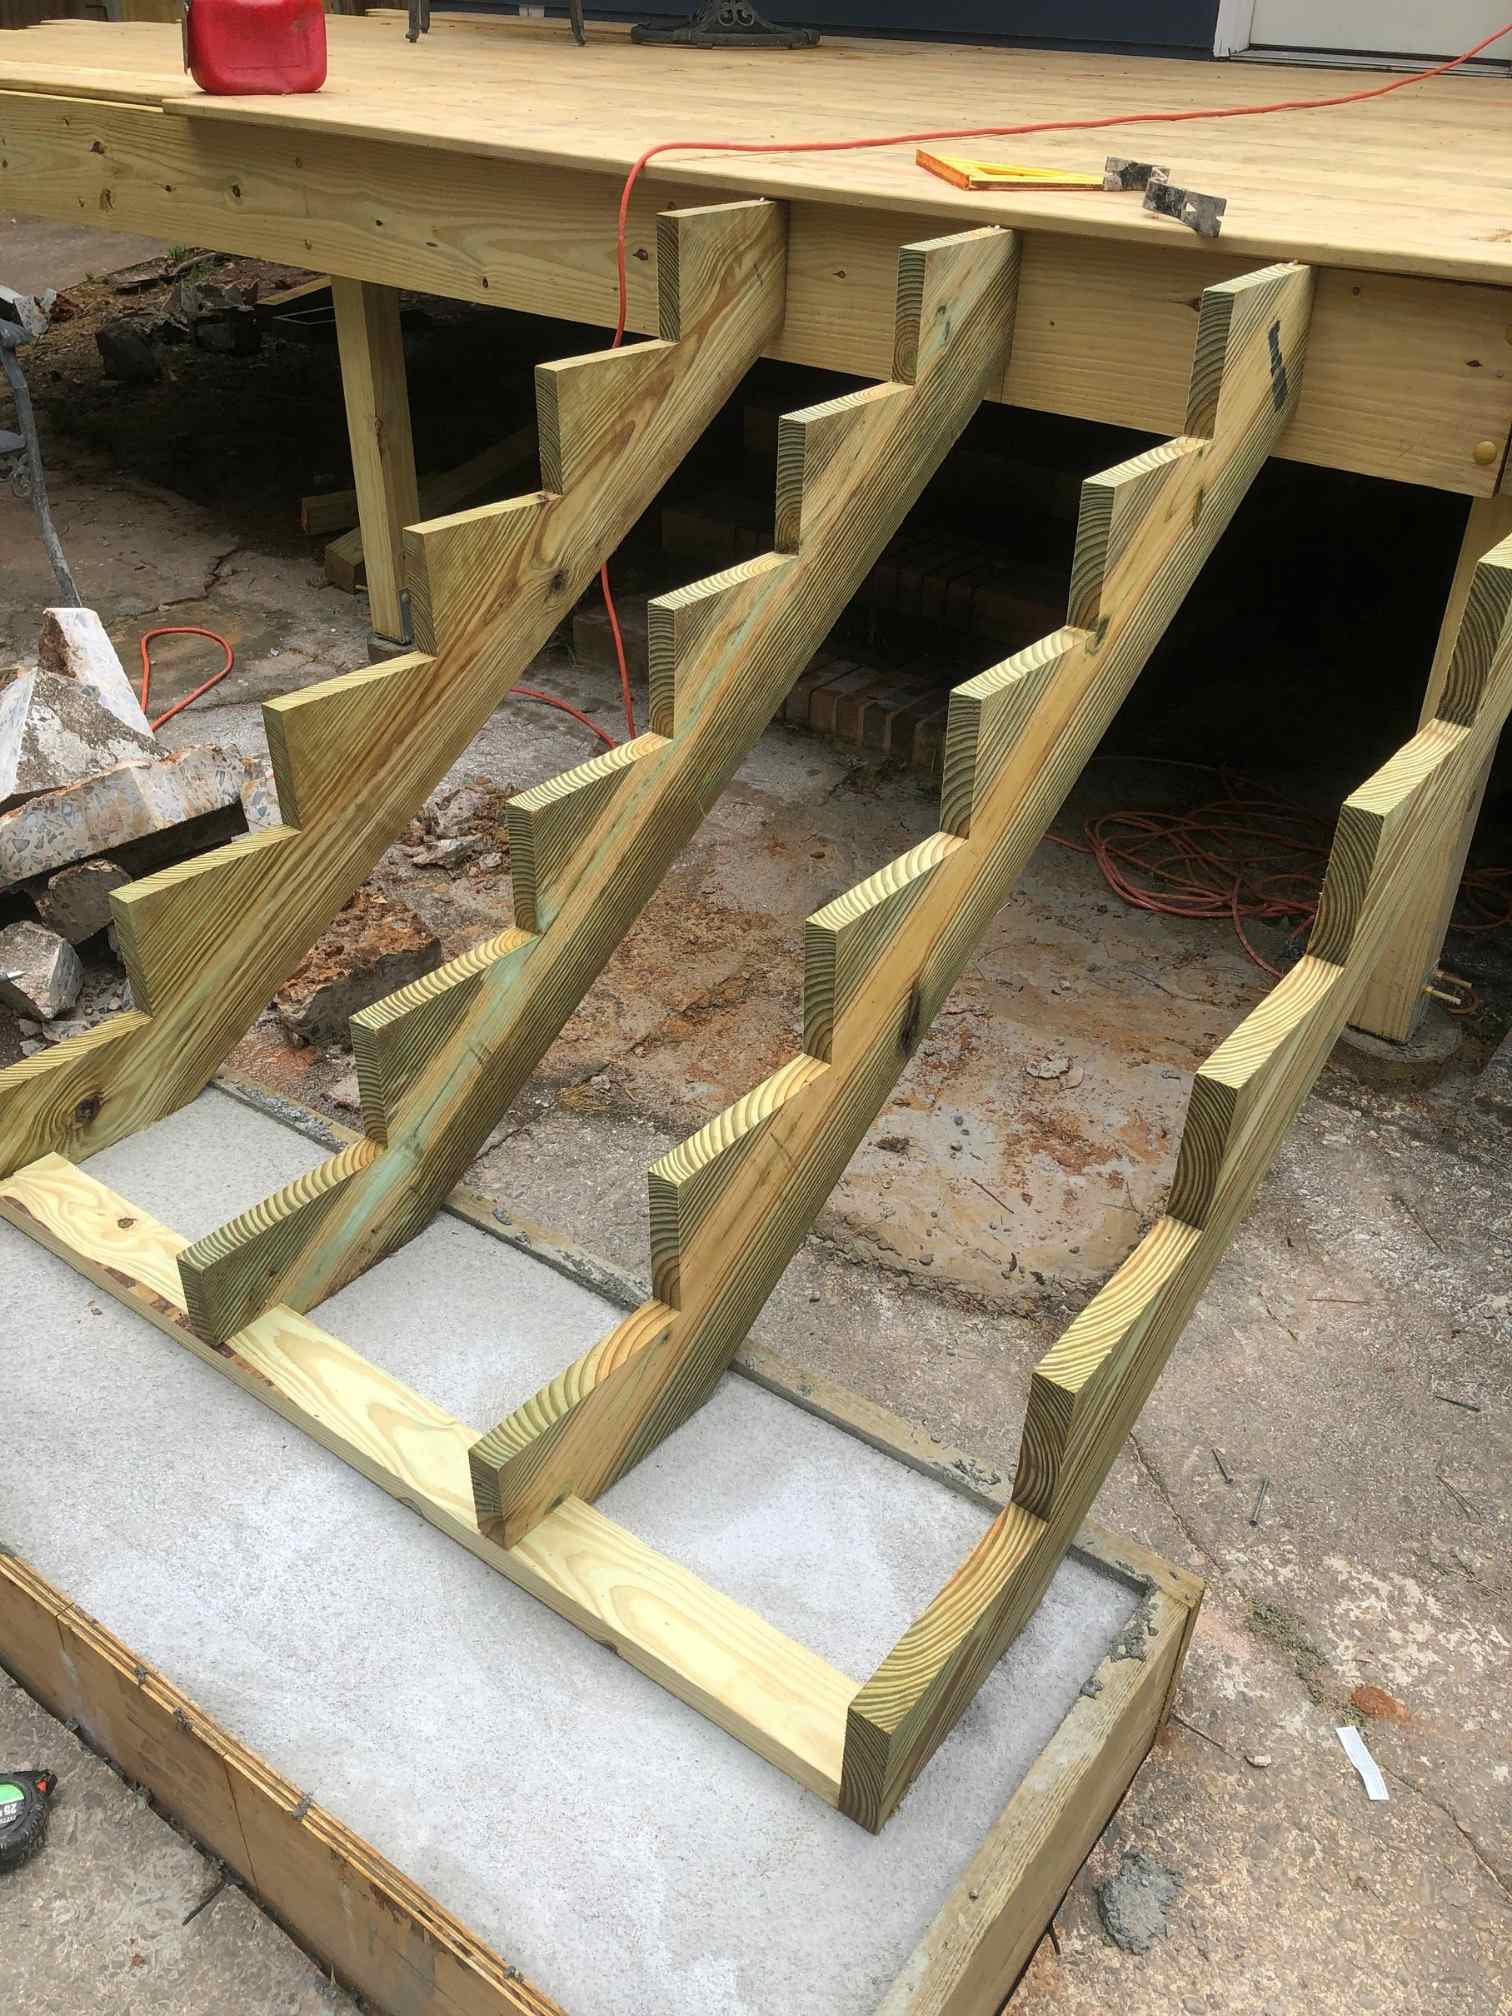
Building a raised deck over concrete is one of the most satisfying projects you can tackle on a split-level home — and it’s more doable than most people think. I built mine in 2019 over an existing concrete patio where I desperately needed a deck. I did it solo, saved over $10,000 compared to a contractor quote, and the deck is still standing strong. This 2026 guide covers everything I learned: tools, materials, current costs, step-by-step instructions, permit requirements, and the mistakes I’d avoid doing it again.

What You’ll Need: Tools
These are the tools I used and would use again for a raised deck over concrete. The right tools make this project dramatically easier.
-
-
-
 Check Price
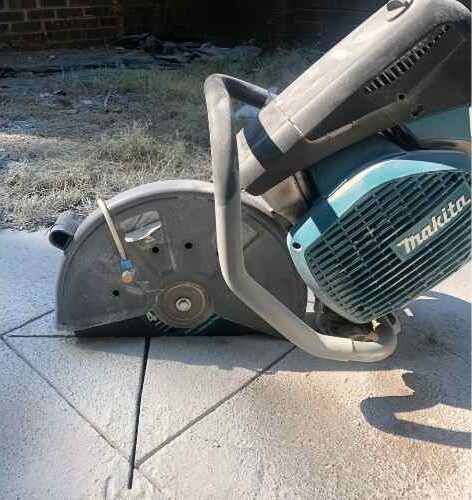
You'll need it for this project, and almost any other wood project you'll do. I'm biased, but I stick with Makita.
We earn a commission if you make a purchase, at no additional cost to you.
-
-
-


Material List
Lumber
- Posts — 4×4 or 6×6 pressure-treated, depending on your deck height and span
- 2×10 beams — for rim joists, floor joists, and blocking
- Deck boards — pressure-treated, composite, or hardwood (your choice)
- 2x4s — for railing, blocking, and bracing
Hardware
- Deck screws (exterior rated)
- Post base brackets (pre-made, for level concrete surfaces)
- Tapcon concrete screws (1/4″ x 2-3/4″)
- Joist hangers
- Carriage bolts and lag screws
- Metal post-top anchors (for poured footings on uneven surfaces)

Giveaways, Ebook, and Forum coming soon. Be the first to know about new content!
How Much Does It Cost to Build a Raised Deck Over Concrete in 2026?
When I built my deck in 2019, I spent $3,376 total — everything included: lumber, concrete, hardware, screws, and nails. I was quoted $13,500 by a local deck company for the same job. The DIY savings were real and significant.
In 2026, lumber costs have normalized from the 2021–2022 spike but remain higher than pre-pandemic pricing. Here’s a realistic breakdown for a mid-size deck (approximately 12×16 feet) built over an existing concrete patio:
| Item | DIY Cost (2026 Est.) | Notes |
|---|---|---|
| Pressure-treated lumber (posts, joists, rim) | $800–$1,400 | Prices vary by region and lumber yard |
| Deck boards (PT pine) | $600–$1,200 | Composite adds $1,000–$3,000 more |
| Hardware (screws, hangers, bolts, brackets) | $200–$400 | Don’t cheap out here — use structural-rated hardware |
| Concrete / footings (if needed) | $50–$200 | Quikrete bags; only needed for uneven surfaces |
| Permit | $100–$500 | Required in most jurisdictions for decks over 200 sq ft |
| Total DIY estimate | $1,750–$3,700 | Varies by size, materials, and region |
| Full contractor estimate | $12,000–$22,000+ | Same scope; varies significantly by market |
The DIY savings on a project like this are among the largest of any home renovation. If you’re comfortable with basic framing and can follow a plan, there’s no reason to pay contractor rates.
Do You Need a Permit to Build a Raised Deck Over Concrete?
In most jurisdictions, yes — if your deck is over 200 square feet or more than 30 inches above grade, a permit is required. Since a raised deck over concrete is by definition elevated, you’ll almost certainly be in permit territory.
Don’t skip this. Permits typically cost $100–$500, protect you when you sell the home, and require an inspection that catches structural problems before they become expensive. Building without a permit on a deck this size can create headaches at closing or with your homeowner’s insurance.
Check with your local building department before breaking ground. In most areas, you can pull the permit yourself as the homeowner — you don’t need a contractor to do it.
How to Build a Raised Deck Over Concrete: Step by Step
Step 1: Plan Before You Touch Anything
Planning is the difference between a deck that goes together smoothly and one that causes you weeks of frustration. Take more time here than you think you need.
Key things to nail down before ordering materials:
- Footing locations: Based on your deck dimensions and joist span, mark exactly where each post will land. Use chalk or spray paint on the concrete. Your ledger board attachment point (where the deck meets the house) should be your starting reference.
- Check for utilities: If you’re cutting through the concrete slab to reach soil below, call 811 (the national dig-safe hotline) before you cut. Even on an existing patio, conduit or old plumbing can run underneath.
- Measure three times: Bad footing placement discovered mid-project can mean starting over. Measure, mark, verify, then measure again before committing.
- Confirm your concrete thickness: Before choosing your footing method, check how thick the existing slab is. A 4-inch minimum is required to use surface-mounted post base brackets reliably.
Read my tutorial for How to cut a hole in concrete for help with this step.
Step 2: Create the Footings
This is where building a raised deck over concrete differs from a standard deck build. You have two options depending on your surface:
Footing Option A: Surface-Mounted Brackets (Level Concrete)
If your concrete surface is perfectly level and at least 4 inches thick, pre-made 4×4 or 6×6 post base brackets are your easiest path. These powder-coated steel brackets sit directly on the concrete surface and are anchored with Tapcon concrete screws.
How to install surface-mounted post brackets:
- Position the bracket at your marked footing location.
- Use a hammer drill with a masonry bit to drill pilot holes through the bracket’s mounting holes into the concrete.
- Drive Tapcon screws through the bracket into the concrete. These screws are the industry standard for anchoring structural hardware to concrete — don’t substitute with standard concrete anchors.
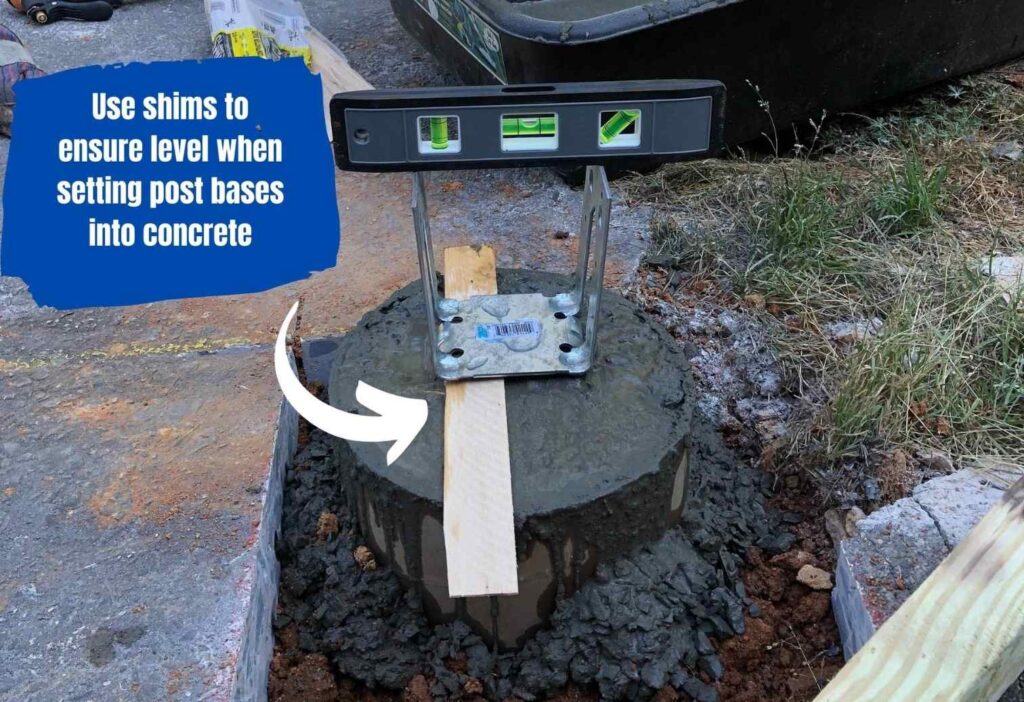
- Verify the bracket is level before moving to the next one. Shim if necessary.
Tip: Confirm the concrete is at least 4 inches thick before choosing this method. Drill a small test hole at the edge of the slab to check depth if you’re unsure.
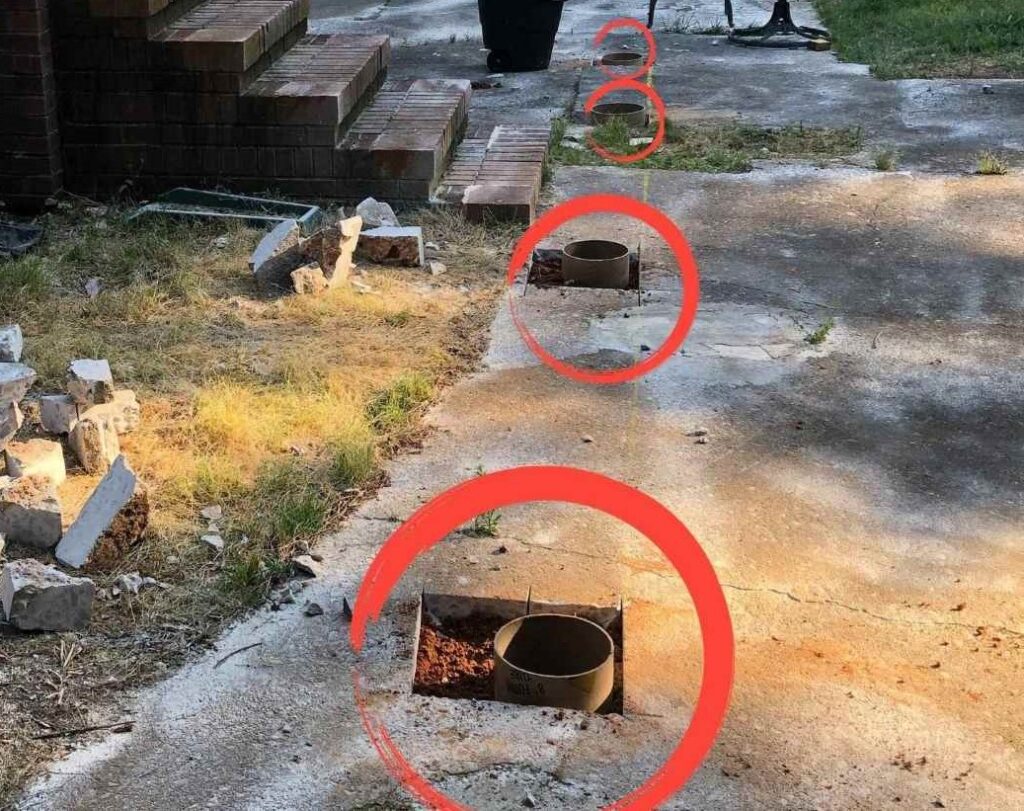
Footing Option B: Poured Footings (Uneven or Insufficient Concrete)
If your concrete surface is uneven, sloped, or thinner than 4 inches, you’ll need to go through the slab and pour footings into the soil below. This is more work but gives you a more solid, code-compliant foundation.
The process: cut through the existing concrete at each footing location (see our full guide on how to cut a hole in concrete), dig down to your local frost line depth, pour concrete footing tubes, and set metal post-top anchors into the wet concrete before it cures.
Footing depth is determined by your local building code — in freeze-thaw climates, this is often 36–48 inches. Your permit inspection will verify footing depth, which is another reason to pull the permit.
Step 3: Set the Deck Posts
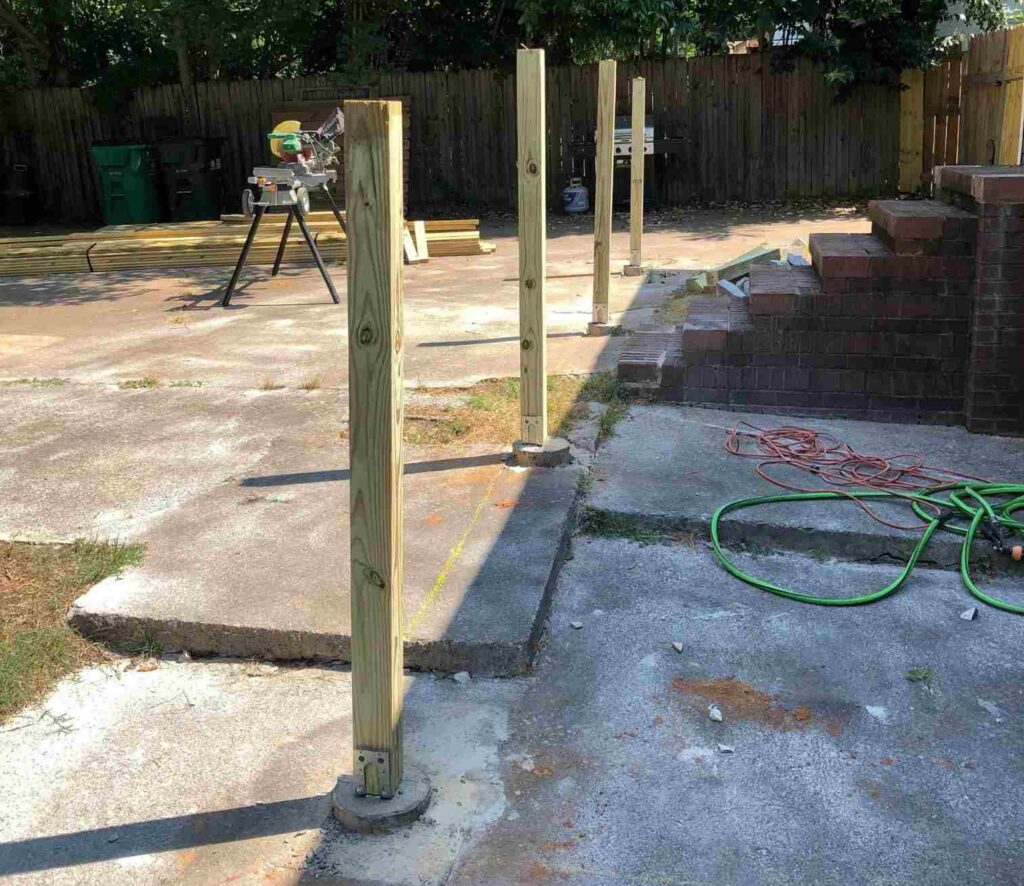
Once your footings or brackets are in place, set the posts. Use 4×4 lumber for decks under 8 feet high; 6×6 for taller structures or heavier loads.
- Drop each post into its bracket or anchor and tack it lightly — don’t fully fasten yet.
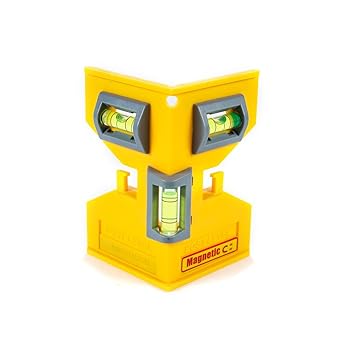
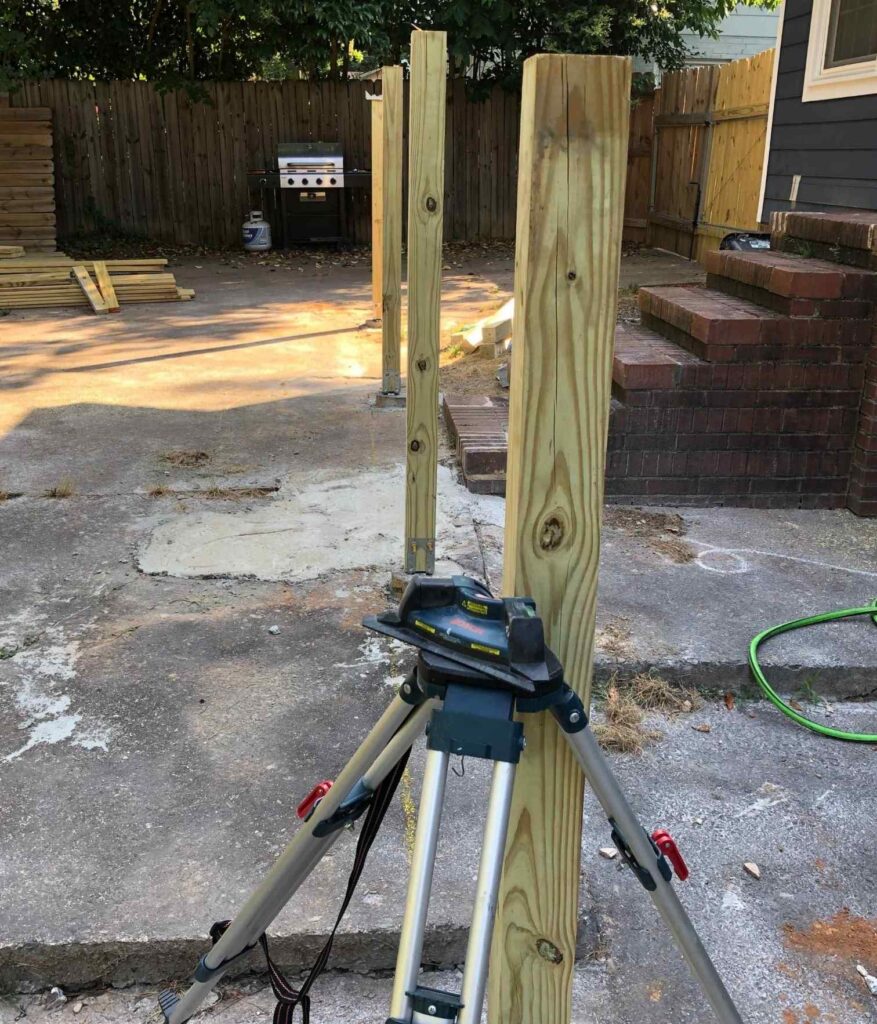
- Use your laser level to verify that posts along each run are at the same height and aligned with each other. A post that’s an inch in or out from its neighbors will create a crooked rim joist that compounds through the entire build.
- Slight lean in a post before the rim joist is attached is normal — the post is only held at one end. Address any major deviation at the footing, not by forcing the post.
Step 4: Install the Rim Joists (Outer Beams)
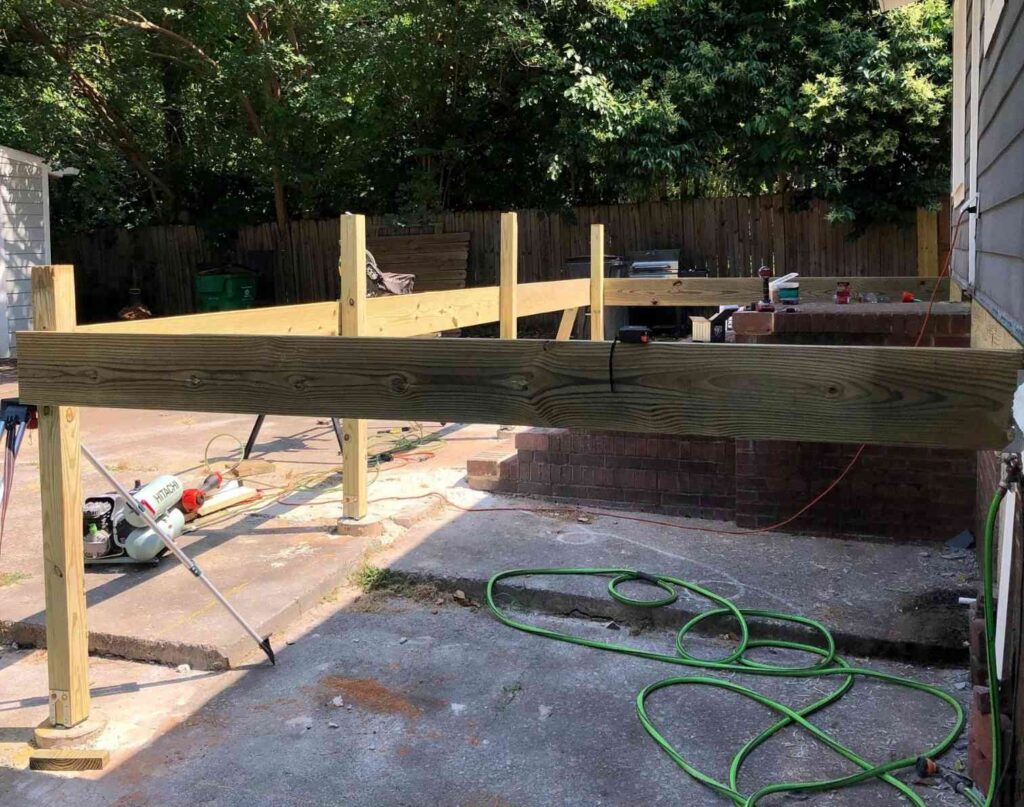
The rim joists form the outer frame of your deck and set the dimensions for everything that follows. This is the step where accuracy matters most — take your time.
- Attach the rim joists to the posts using lag screws or carriage bolts. Pre-drill to avoid splitting.
- Maintain consistent height across all rim joists using your laser level. Any variation here shows up in the finished deck surface.
- This step requires two people. One person holds the beam in position while the other fastens it. 2×10 beams are heavy and awkward solo — don’t try to muscle them alone.
- At corners, overlap the rim joists so each piece is fully supported by a post. This gives you a snug, structurally sound corner with no open cell exposure.
Step 5: Install the Interior Joists
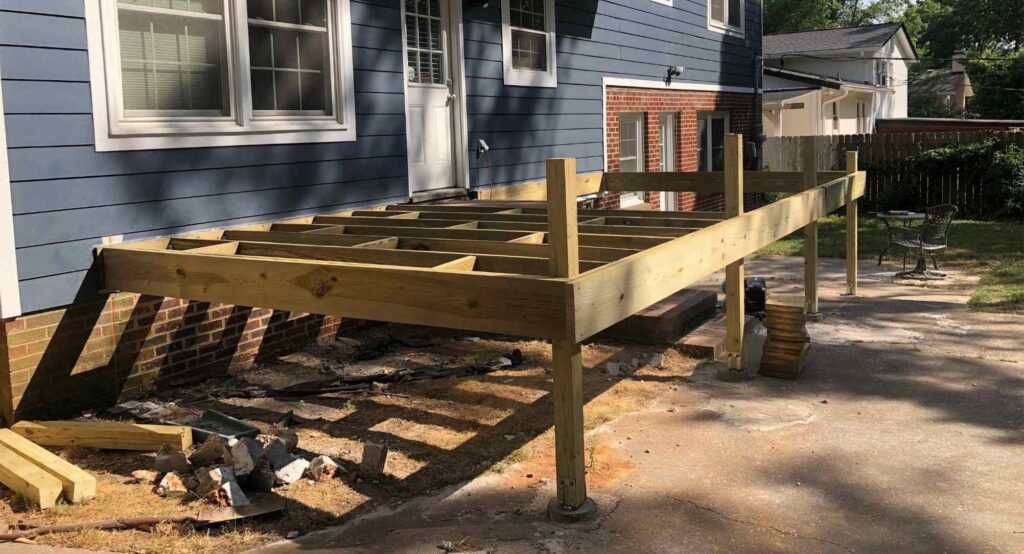
With the outer frame squared up, interior joists fill in the deck floor structure. For a rectangular deck this is a straightforward, repetitive process.
- Calculate joist spacing based on your deck board material — 16 inches on center for pressure-treated wood, 12 inches on center for composite boards (check your composite manufacturer’s specs).
- Mark the centerline of each joist location on the interior face of both opposing rim joists.
- Install joist hangers at each marked location on both rim joists. The joist hanger holds the interior joist at the correct height and provides the structural connection — do not skip these.
- Set each joist into its hangers and nail through the hanger flanges into the joist. Verify each joist is straight and level before moving on.
Step 6: Install Blocking for Extra Stability
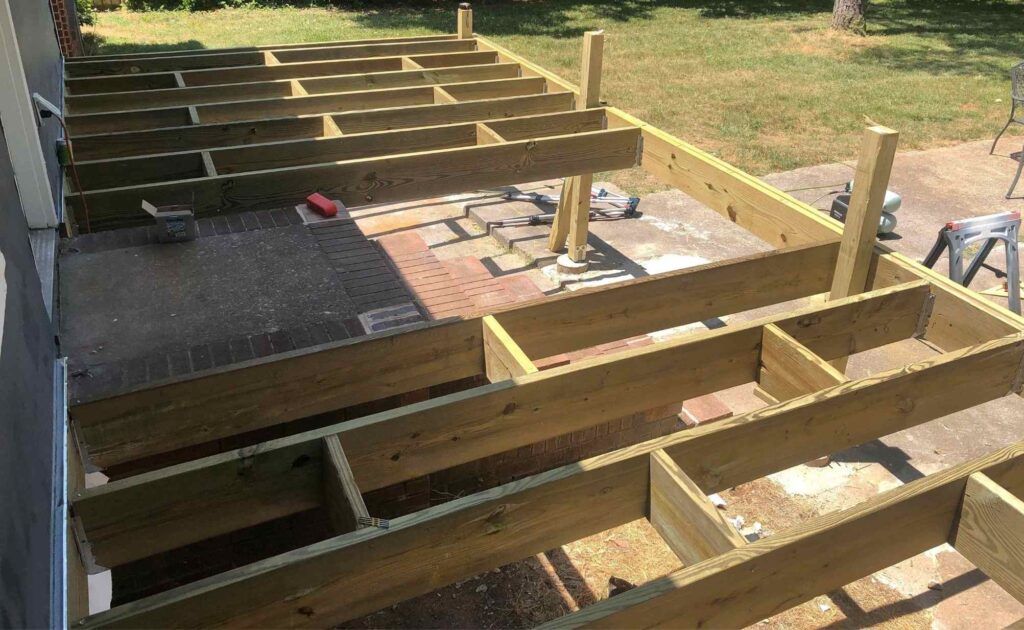
For any joist span over 6 feet, install blocking — short 2×10 sections cut to fit snugly between the joists at the midpoint of each span. Blocking prevents joist rotation and flex under load, which you’ll feel immediately when you walk on an unblocked deck.
Stagger the blocking in a zigzag pattern so you can nail through the face of the joist into the end of each block. This is easier than toenailing and gives a stronger connection.
Step 7: Install the Deck Boards
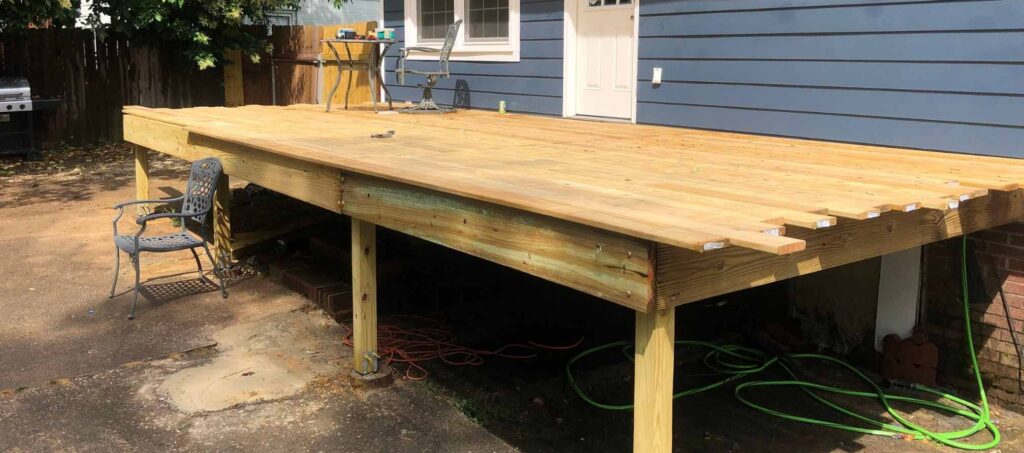
The most satisfying step — and the longest. Start from the house side and work outward. Leave a 1/8–1/4 inch gap between boards for drainage and expansion.
Do yourself a favor and use a dedicated cordless screw gun for this step. I installed my deck boards with a regular drill on my hands and knees and paid for it. A screw gun drives deck screws to a consistent depth automatically and saves enormous time and strain. It’s the tool I wish I’d had from the start.
Let the board ends run long past the rim joist as you install — snap a chalk line at the desired overhang (typically 1–1.5 inches) and trim all boards in one pass with a circular saw at the end. This gives you a cleaner, more professional edge than trying to cut each board to length individually.
What I’d Do Differently
I built this deck solo and learned a few things the hard way:
- Get a helper for rim joist day. Holding a 16-foot 2×10 at height while simultaneously fastening it is genuinely difficult alone. Borrow someone for that one day.
- Use a screw gun for deck boards from the start, not a regular drill. My back would thank me.
- Pull the permit before starting, not after. It’s a straightforward process and removes any uncertainty.
- Order 10% more lumber than your plan calls for. You will make cuts you didn’t plan for.
- Use a post level when setting posts solo. Trying to hold a 4×4 plumb while checking a standard level is a three-handed job.
Finishing Touches
Once the deck boards are down, the project isn’t finished — it’s just the floor. A few things I did after completing the deck structure:
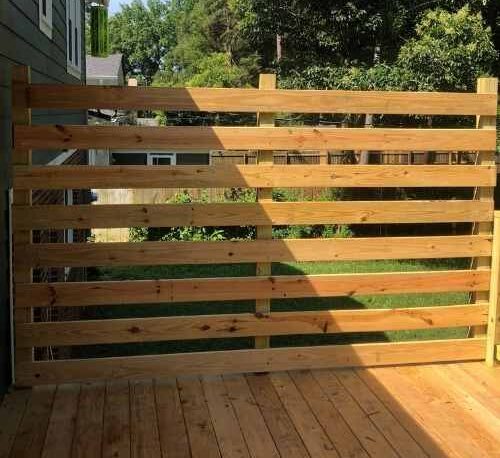
- Privacy screen: I added a privacy screen on the side that needed it most for under $100. Made a huge difference in how usable the space actually is.
- Stair landing: If your deck stairs land on uneven ground, you’ll need a level landing pad. See our guide on pouring a concrete landing pad for deck stairs.
- Railing: Required by code for decks over 30 inches above grade. Budget for this separately — a basic pressure-treated railing system runs $15–$25 per linear foot in materials.
Frequently Asked Questions
Can you build a raised deck directly over an existing concrete patio?
Yes — and it’s one of the most common split-level deck projects. The concrete patio actually works in your favor: it gives you a stable, level work surface and eliminates the need to excavate dirt for every footing. The key question is whether your concrete is level and thick enough (4 inches minimum) to use surface-mounted post base brackets, or whether you need to cut through and pour new footings below.
How much does it cost to build a raised deck over concrete in 2026?
For a DIY build on a mid-size deck (approximately 12×16 feet) using pressure-treated lumber, expect to spend $1,750–$3,700 in materials including hardware and a permit. A contractor doing the same job in most markets will charge $12,000–$22,000+. When I built mine in 2019, I spent $3,376 and was quoted $13,500 by a local deck company.
Do you need a permit to build a raised deck over concrete?
In most jurisdictions, yes. Decks over 200 square feet or more than 30 inches above grade typically require a building permit. Since a raised deck over concrete is elevated by definition, you’ll almost always be in permit territory. Pull the permit before you start — it protects you at resale and ensures your footing depths get inspected.
What kind of footings do you use for a deck over concrete?
Two options: surface-mounted post base brackets anchored with Tapcon concrete screws (for level concrete at least 4 inches thick), or poured concrete footings that go through the existing slab into the soil below (for uneven or thin concrete). The surface-mounted bracket method is significantly faster and easier when the conditions allow for it.
How do you anchor deck posts to concrete?
Use powder-coated steel post base brackets and Tapcon concrete screws. Drill pilot holes through the bracket’s mounting holes into the concrete with a masonry bit, then drive the Tapcon screws into the concrete. Tapcons are the industry standard for this application — they bite into concrete far better than standard anchors and are rated for structural use.
What size lumber do I need for a raised deck over concrete?
For most residential decks: 4×4 or 6×6 posts (6×6 for taller or heavier builds), 2×10 for rim joists and floor joists, and your choice of deck board thickness (typically 5/4×6 for pressure-treated or the composite manufacturer’s spec). Always verify your lumber sizing with your local building code — span tables determine the minimum joist size for your specific deck dimensions.
Final Thoughts
Building a raised deck over concrete is absolutely within reach for a motivated DIYer. The concrete patio that felt like a problem turns out to be an advantage — it gives you a stable work platform and simplifies your footing options. Plan thoroughly, pull your permit, and don’t try to carry 2×10 beams alone.
The results speak for themselves. I saved over $10,000 doing this myself, and years later the deck is still solid. If you have questions about your specific situation, drop them in the comments below.
Related reading:
- How to Cut a Hole in Concrete (Step by Step)
- How to Pour a Concrete Landing Pad for Deck Stairs
- How to Add a Privacy Screen to an Existing Deck for Under $100

Max
Max Lowrie, founder of MySplitLevel.com® and author of The Live In Flip© bought his first split level house in 2016. During a lengthy renovation, Max noticed that there was little useful content online specific to split-level homes. Max now devotes his time to share his knowledge hoping to help homeowners avoid unnecessary mistakes, and provide a blue print for split-level owners nationwide.
Giveaways, Ebook, and Forum coming soon. Be the first to know about new content!