Updated: May 2026
Cutting a hole in a concrete slab may seem like some monumental task. After all, it’s concrete! Don’t I need a sledgehammer? Don’t I need to hire a professional? Isn’t concrete permanent?
No. No. And No.
Whether it’s a hole in a concrete patio, a concrete slab, or a concrete foundation, a hole can be cut with just a few tools, careful planning, and a little know-how. I’ve done this on my own split-level for deck footings and I’ll walk you through the full process here — tools, costs, steps, safety, and everything you should realistically expect before you start.
Why Do You Need to Cut a Hole in Concrete?
There are three common reasons a split-level homeowner ends up cutting into concrete. Knowing which one applies to you helps you size the project correctly before you start.
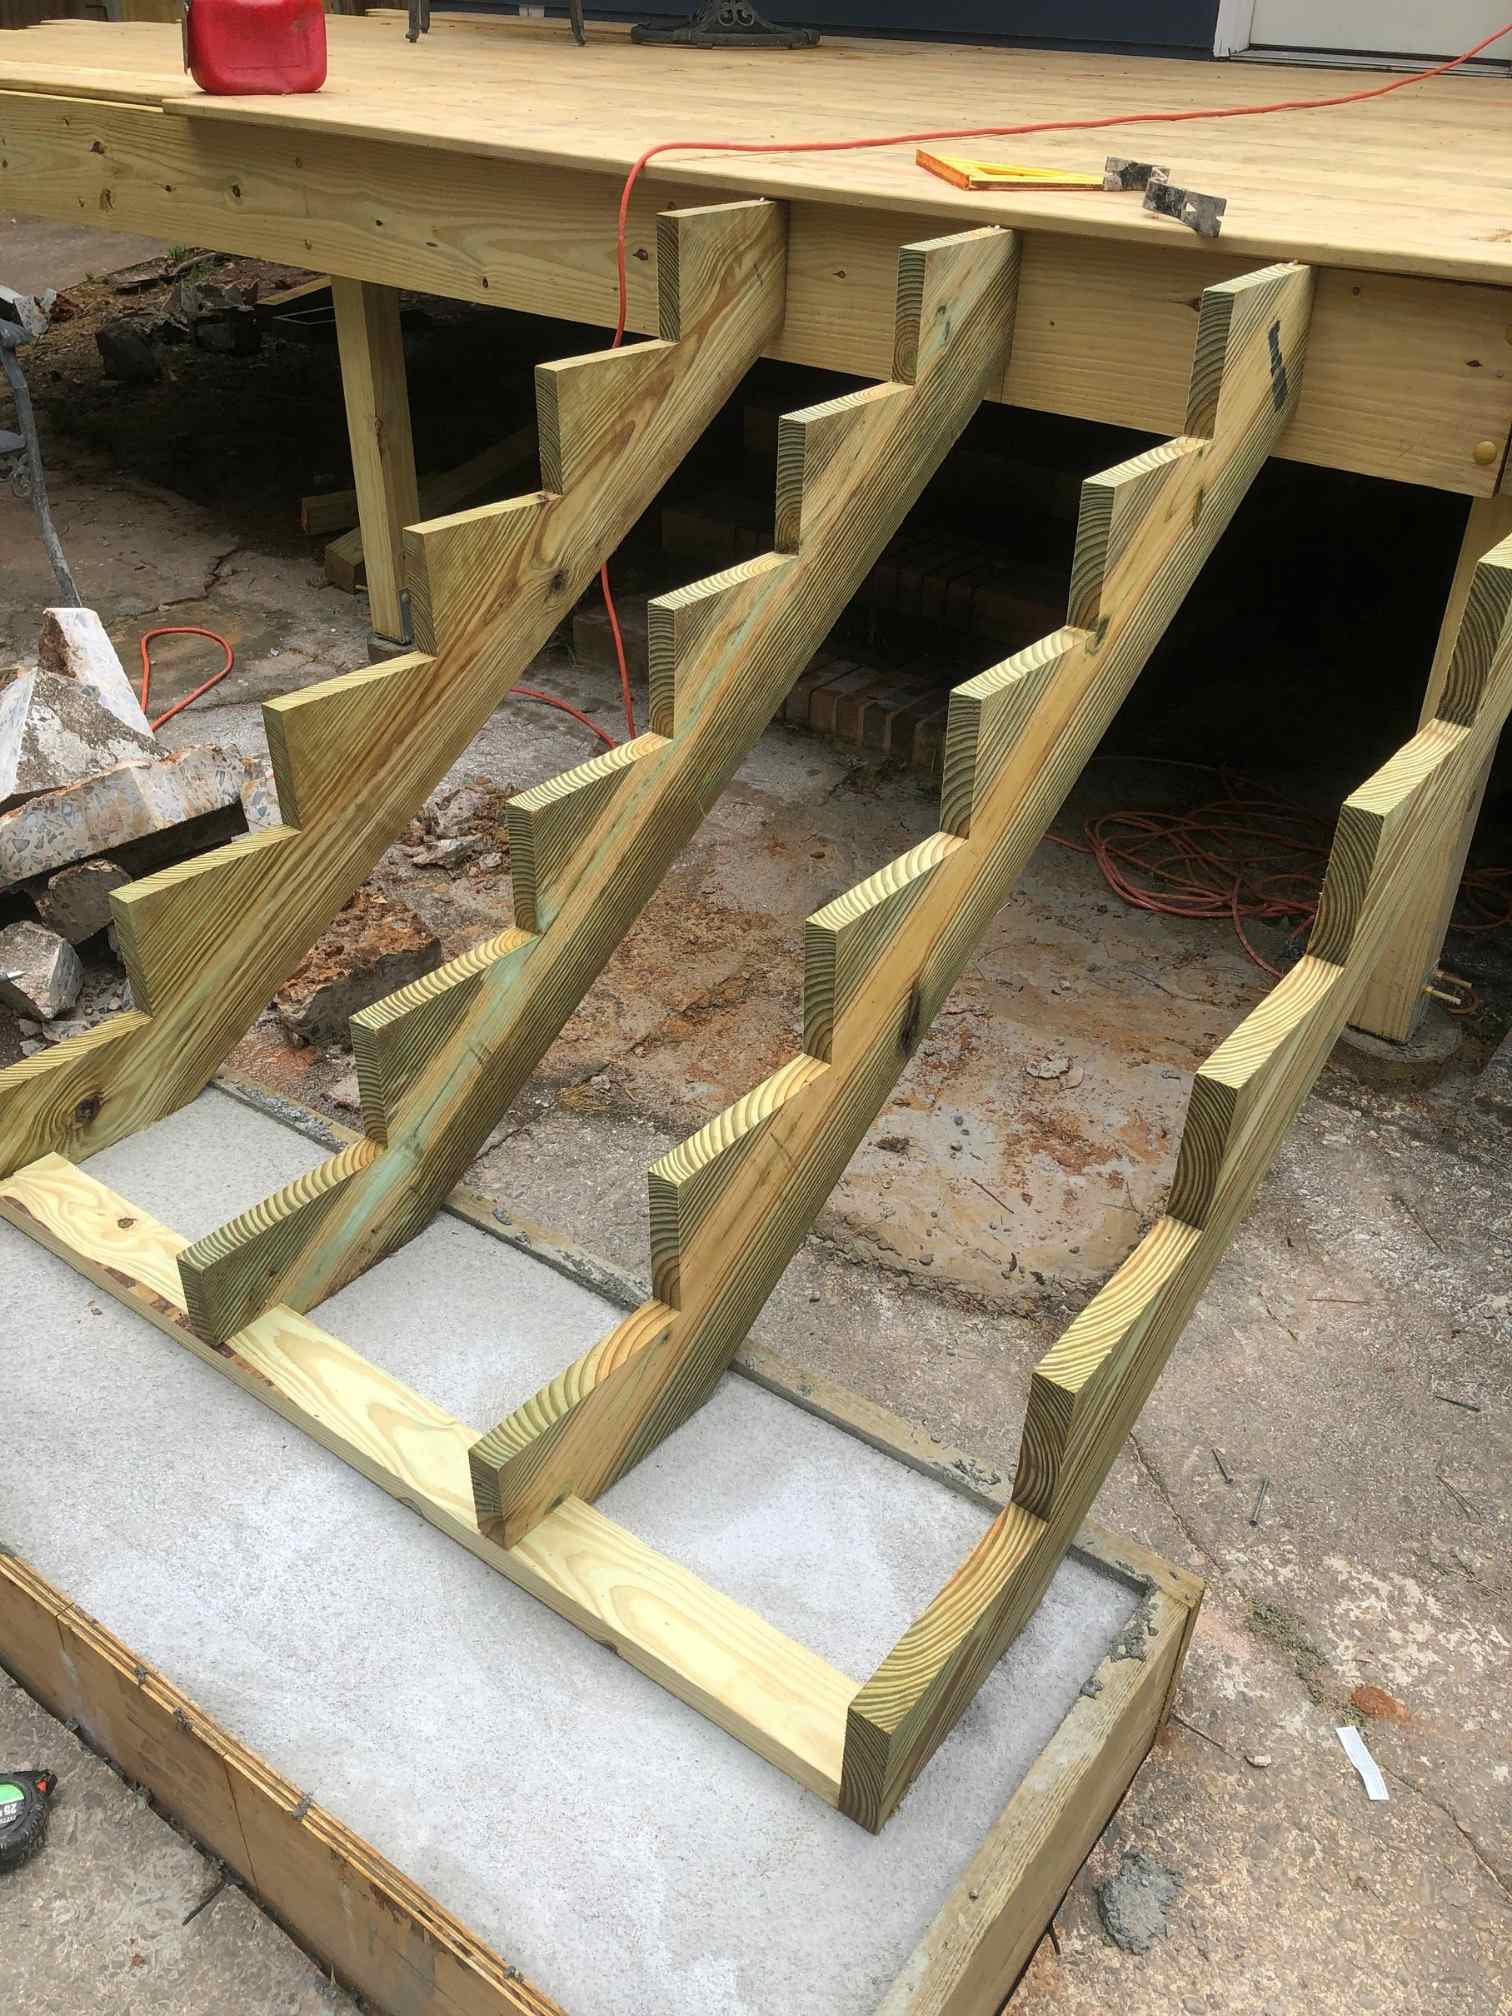
Deck Footings
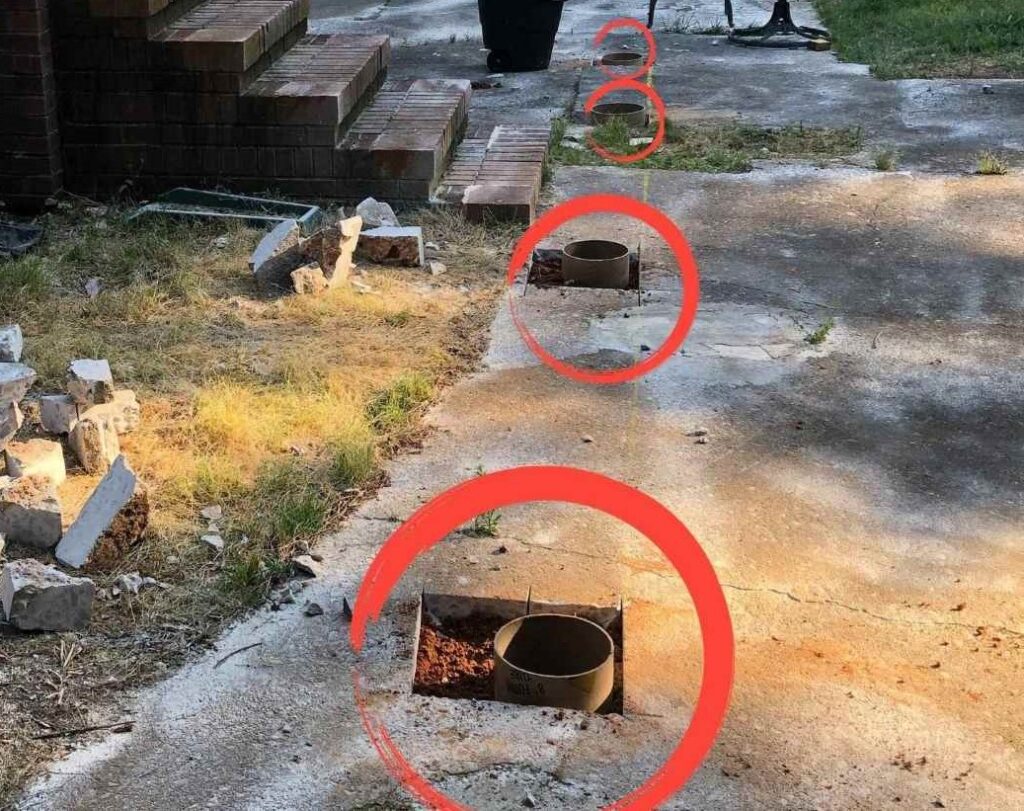
This was my situation. I was building a deck over an existing concrete patio and needed post footings that went through the slab into solid ground below. Pre-made surface-mounted brackets weren’t an option because the concrete was too thin in spots. Cutting through the slab and pouring new footings below was the only way to get a level, structurally sound result.
If this is your situation, read this guide first, then head over to the concrete landing pad guide for the pour-and-anchor steps that follow the cut.
Plumbing Access Through a Concrete Slab
In homes with a concrete slab foundation — common on the lower level of split-level homes — any plumbing repair or new rough-in requires cutting into or trenching through the slab to access the pipes below. This is the most precision-demanding version of this project because you need to avoid the pipes you’re trying to reach. If there’s any doubt about pipe locations, call a plumber for a locate before cutting.
Tearing Up an Existing Patio
If you’re removing an old concrete patio entirely to modernize your split-level’s outdoor space, cutting is how you create a purchase point to break up and remove the rest. Without cuts, breaking up a full concrete patio by brute force is exhausting and inefficient. A few strategic cuts and the whole slab comes apart in manageable sections.
Before You Start: Call 811
Before cutting into any concrete that sits over soil — a patio, a slab, a foundation edge — call 811. It’s the national call-before-you-dig utility locator service, it’s free, and it takes five minutes. Buried conduit, gas lines, and water supply lines can run surprisingly close to the surface near exterior walls and patios. This step is non-negotiable.

Giveaways, Ebook, and Forum coming soon. Be the first to know about new content!
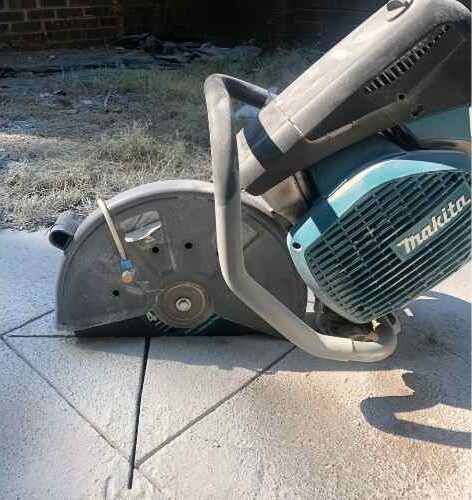
Renting vs. Buying the Concrete Saw
Unless you have multiple concrete-cutting projects lined up, rent the saw. A quality concrete saw costs $800–$2,000 to buy and is a tool most homeowners use once or twice in a lifetime. The rental is $80–$150 per day from Home Depot or Sunbelt Rentals and gives you a well-maintained machine with a full tank of gas.
One important tip: buy the diamond blade on Amazon before you pick up the rental. Rental store blades are often worn and significantly overpriced. Buying your own 14” diamond blade beforehand saves money and guarantees a sharp cut.
Since ive needed a concrete saw now on multiple projects, I wish I would have bought this first instead of renting one. You STILL have to buy their expensive blades if youre renting a concrete saw, and then your total price is even higher than it would be had you just bought this vevor saw.
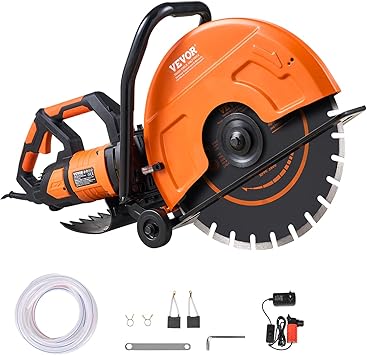
Even if you decide to rent, buy the blades here. I promise theyre more expensive and same quality at home depot.

Tools Needed
- Concrete saw (rent from Home Depot, $80–$150/day) or angle grinder with diamond cup wheel for smaller cuts
- 14” diamond saw blade — buy on Amazon before the rental pickup — store blades cost more and cut worse
- Air chisel / long barrel air hammer — for breaking apart cut sections. The long barrel gives you better leverage on the concrete chunks.
- Pro bar / gooseneck wrecking bar — gives you the fulcrum to pry broken sections out cleanly after the chisel does its work
- Garden hose nearby — concrete saws use water as a coolant. You’ll be wetting the cut area throughout and hosing down after
- Chalk or spray paint in two colors — one for the hole outline, one for the cut lines
Safety Gear — Non-Negotiable
⚠️ This is one of the more genuinely dangerous DIY projects covered on this site. Concrete saws are powerful, fast, and unforgiving. Broken concrete edges are razor sharp. Concrete dust is a serious long-term respiratory hazard. Do not skip any item on this list.
- P100 respirator (half-face) — not an N95, not a dust mask. Concrete dust contains crystalline silica which causes permanent lung damage with repeated exposure. A P100 rated respirator is the minimum for this job.
- Safety glasses or a full face shield — concrete chips travel fast and far
- Hearing protection — concrete saws are genuinely damaging to unprotected ears at close range
- Cut-resistant gloves — broken concrete edges are as sharp as broken glass. Standard work gloves are not enough.
- Steel-toed boots — concrete chunks are heavy. Protect your feet.
- Long sleeves and pants — concrete slurry from the saw splashes and is caustic on skin with prolonged contact
How to Cut a Hole in Concrete: Step by Step
Step 1: Plan and Mark
Identify the absolute center point of the hole you need to make and mark it clearly. Then outline the hole itself in one color of chalk or spray paint, and mark the cut lines you’ll actually make in a second color. You’re not cutting around the outline of the hole — you’re making strategic cuts across it that allow you to break the concrete into removable chunks.
This two-color system sounds like overkill until you’re standing over a running concrete saw trying to remember which line is which. Mark everything clearly before the saw starts.
Step 2: Set Up Water
Position a garden hose near the cutting area. Concrete saws use water as a coolant and dust suppressant during cutting. Have a helper wet the cutting line continuously while you operate the saw, or wet the area between passes if working alone. This also significantly reduces the dust cloud — though you’re still wearing your P100 respirator regardless.
Step 3: Make Your First Diagonal Cut
Start your first cut diagonally across the marked square — corner to corner. Don’t worry about cutting too much; it’s a necessary part of the process. Cut until you feel the blade break through to soil or void below. Let the saw do the work — don’t force it downward.
Tip: Make your first pass slowly and check that you’re following the marked line. Once you’ve made a starter groove, subsequent passes are easier to keep on track.
Step 4: Make Your Second Diagonal Cut
Make a second diagonal cut in the opposite direction, creating an X across the square. These two cuts divide the hole area into four roughly triangular sections that are far easier to break out and remove than a single solid square.
Step 5: Break Out the Concrete Sections
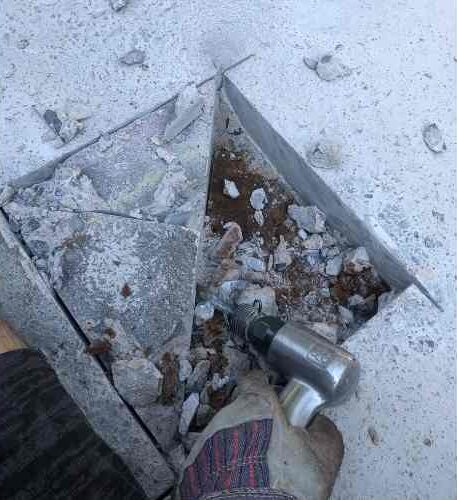
Use the air chisel to break apart the concrete along your cut lines. Work the chisel tip into the cut seam and pry upward. Then use the pro bar to get a larger purchase point and lever the broken sections out. The pro bar gives you significantly more mechanical advantage than the chisel alone on larger chunks.
Work methodically from one section to the next. Remove each broken piece fully before moving to the next one — concrete debris in the hole makes it harder to chisel the remaining sections.
Step 6: Clean Up the Hole
Once all four sections are out, remove any remaining debris and check the hole dimensions. The edges will be rough — that’s normal and expected. If you need clean, square edges (for a tight footing pour or a precise plumbing access), use the concrete saw or an angle grinder to trim the edges back to your original outline.
Step 7: Hose Down
Hose down the entire work area thoroughly after you’re done. Concrete slurry dries hard and fast on surrounding surfaces. Wet it and sweep it while it’s still workable.
For Larger Tearouts: Use a Demolition Tool
The air chisel method works well for precise, small holes (under roughly 4×4 feet). For larger patio tearouts, a dedicated demolition tool is the faster and less exhausting option.
For medium to large concrete tear-outs. This tool also makes quick work of a bathroom demo.

For medium to large concrete tearouts, an electric demolition hammer also makes quick work of a full bathroom demo if you’re gutting the lower level of your split-level at the same time.
What to Expect (Honestly)
This project is not pleasant. It’s loud, messy, physical, and slow. Here’s what you’re signing up for:
- Dust: A tremendous amount of it. Even with water, concrete cutting creates a dense cloud of fine particulate. Your P100 respirator is not optional. Your neighbors will check in on you. Budget time to hose everything down after.
- Noise: Concrete saws are genuinely damaging to unprotected ears. Wear hearing protection and give neighbors a heads-up before you start — especially in the morning.
- Water: Concrete saws use water to lubricate and cool the blade. Expect significant splashback during cutting. Long sleeves and an apron help.
- Physical difficulty: Breaking out concrete chunks with a chisel is hard work. Budget at least twice as long as you think it will take for the chisel-and-pry phase.
- Sharp edges: Broken concrete is as sharp as broken glass. Cut-resistant gloves and long sleeves for the entire demo phase.
That said — when it’s done, it’s done. The hole is there, the concrete is out, and whatever you needed to access or anchor is now accessible. The sense of accomplishment on a project like this is real.
Frequently Asked Questions
Can I cut a hole in concrete without a concrete saw?
For small holes (under 12 inches across), an angle grinder with a diamond cup wheel can work. For anything larger, a concrete saw is the right tool — rent one rather than attempting a larger cut with an angle grinder. The angle grinder method is slower, produces more heat, and is harder to control on a straight line.
How long does it take to cut a hole in concrete?
For a typical deck footing hole (roughly 12×12 inches through a 4-inch slab), plan on 1–2 hours including setup, cutting, and breakout. Larger holes scale accordingly. The chisel-and-pry phase almost always takes longer than expected — budget generously.
Do I need a permit to cut through my concrete patio?
For deck footings, the permit covers the deck build as a whole — the footing cuts fall under that same permit. For plumbing access, yes, you’ll need a plumbing permit in most jurisdictions. For a straightforward patio tearout with no new construction following it, typically no permit is required. Check with your local building department when in doubt.
What’s the difference between a concrete saw and an angle grinder for this job?
A concrete saw (also called a cut-off saw or demo saw) uses a large 14” diamond blade and cuts to a depth of 4–5 inches in a single pass — ideal for cutting through a full-thickness slab. An angle grinder uses a smaller 4–7” blade and cuts 1–2 inches deep per pass, requiring multiple passes to get through a thick slab. For anything more than a thin slab or small hole, rent the concrete saw.
Next Steps
Once your hole is cut and the concrete is out, the next step depends on why you cut it. If you’re pouring new footings or a stair landing, the complete guide to pouring a concrete landing pad covers the form-building, pour, and anchoring process in detail. If this is part of a full deck build, the raised deck over concrete guide covers the whole project start to finish.

Max
Max Lowrie, founder of MySplitLevel.com® and author of The Live In Flip© bought his first split level house in 2016. During a lengthy renovation, Max noticed that there was little useful content online specific to split-level homes. Max now devotes his time to share his knowledge hoping to help homeowners avoid unnecessary mistakes, and provide a blue print for split-level owners nationwide.
Giveaways, Ebook, and Forum coming soon. Be the first to know about new content!