Can you see too much of your neighbor while you’re on your deck? Does that weird neighbor look over the fence a little too much when you’re in your hot tub? Are you tired of small talk from across the fence when you’re just trying to crack open a stella on a hot summer day?
If you answered yes to any of those, you need a privacy screen for your deck.
It may seem impossible to do since your deck has already been built; good news, it’s possible to add a privacy screen to an existing railing – and it can be done in just one day.
First- lets go over a list of tools and materials you’ll need
Tools
-
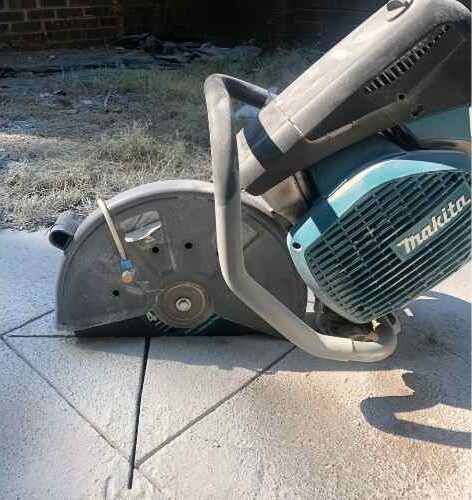
 Check Price
A powerful and efficient circular saw from Makita. This saw cuts through beams with ease while other's hang up, or don't provide enough power for the job.
We earn a commission if you make a purchase, at no additional cost to you.
-
 Check Price
A multitool is a must have, used for fine cuts in areas with limited access.
We earn a commission if you make a purchase, at no additional cost to you.
Materials
- Wood for post material – can be 4x4s or 6×6’s)
- Wood for slat material – I used leftover deck boards, but there are many options.
- Deck screws or nails
- Lag Screws
- That’s it!

Giveaways, Ebook, and Forum coming soon. Be the first to know about new content!
Getting Started
Whether you’re constructing your deck with this in mind, or adding it to an existing deck railing, it’s important to layout exactly where this shade will block and if you’ll have enough room to block the view that you are intending to. Unfortunately, sometimes blocking the entire side you don’t want exposed is impossible, this can vary based on the size of the deck itself.
1. Assess the shade
Is this going to give you the privacy you need? Will this stop the creepy neighbor from watching you while you sunbathe? A simple way to test this is to hold up a large bedsheet or curtain in the approximate area where the privacy screen will go, and see if it gives you what you need.
If you sunbathe, you may find that this blocks the sun at that prime bronzing hour, in which case we need to back up and punt. Or maybe you just need to get comfortable on the roof.
2. Removing Existing railing
If the deck contains an existing deck railing, it will most likely need to be removed. The shade I build in this tutorial does not allow for deck railing to be in place, but you may come up with a more creative option that does.
Carefully remove the existing railing, doing your best not to damage the deck in the area where the privacy screen will be erected. You can damage the railing all you want, we dont need it, however be careful not to damage the railing that will stay where the shade may butt up to.
3. Plan for post location
The posts you need for your privacy fence should be no more than 4 feet apart. Some will say that these posts can be further apart, however with the added weight of the deck boards that I used, sagging would become an issue overtime.
Another thing to think about is potential wind gusts, which will strain the integrity of the posts, so having them closer together provides extra durability.
Notch out spaces for the posts using a multitool like this one. The notches should be just wide enough so that your 4×4 post will sit snug inside the cutout.
One way to accomplish this is by using a small piece of the 4×4 post as a template. Keep in mind that although the posts are commonly called “4X4”, they actually measure 3.5’’ X 3.5”, therefore measuring a 4” space will leave you with too much excess space, and a crappy looking base that we will have to cover up later.
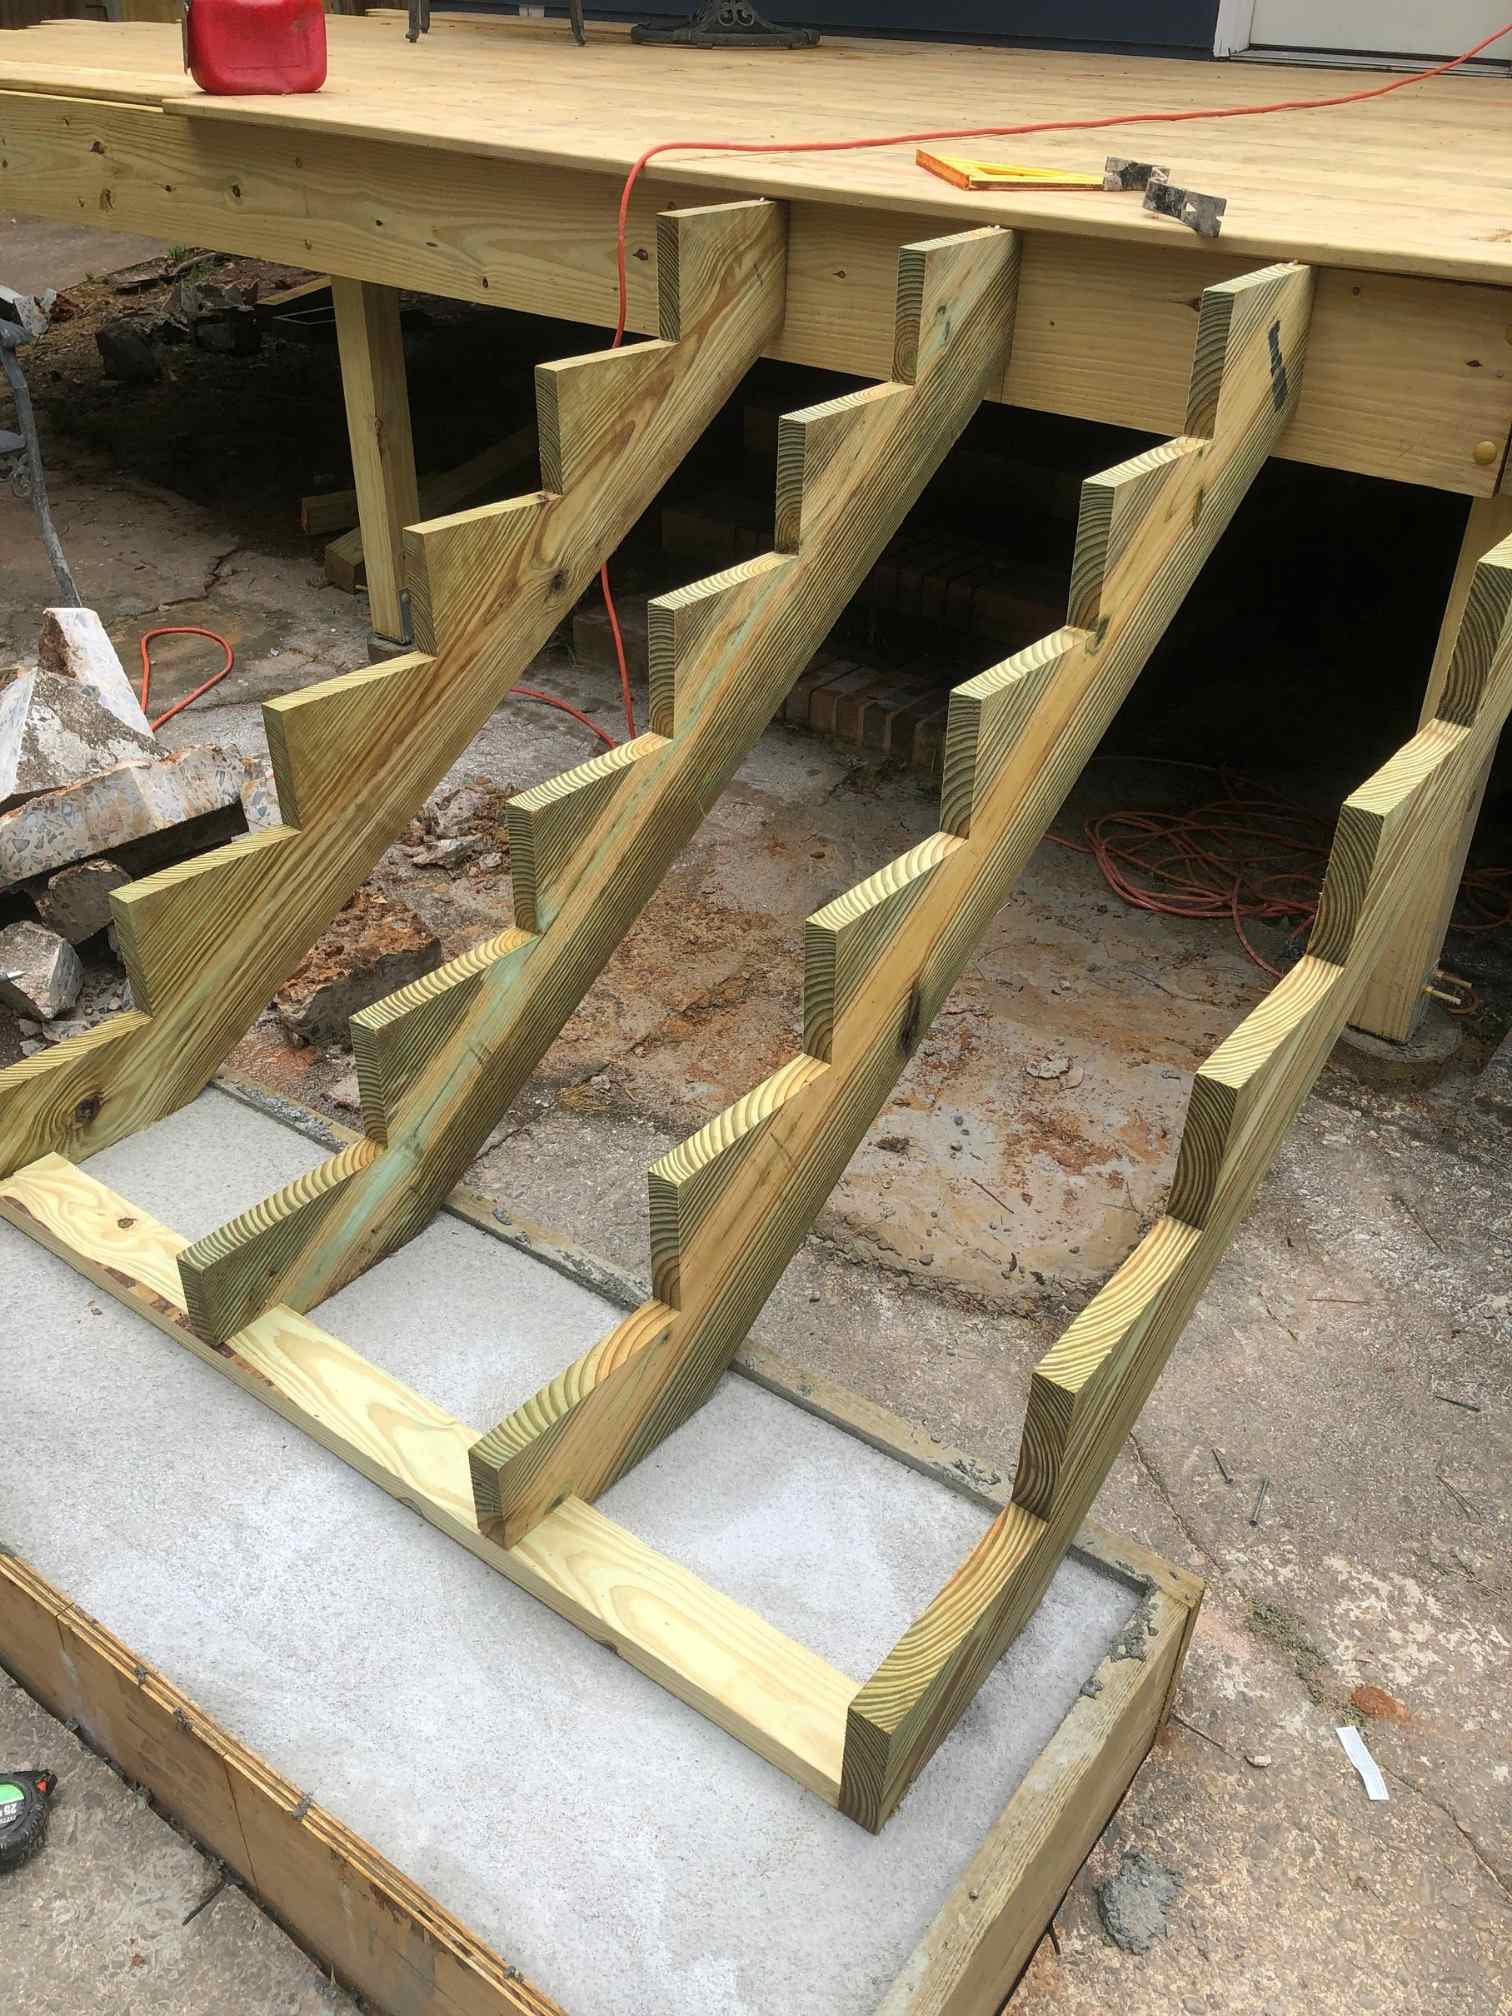
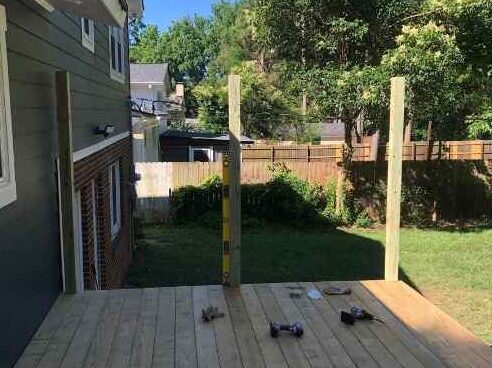
4. Cut and Set the Posts
The posts need to be notched out, creating a lip that will sit on the deck surface. The area in the back will be secured to the side of the deck with lag screws.
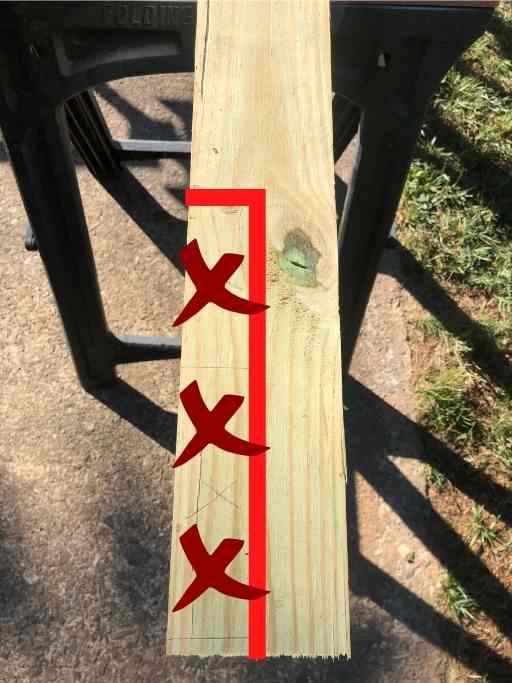
As you can see we want to cut the post precisely in half, up to the point that will sit on the deck floor. Your “tail”- (area that we did not cut out of the post) should be the length of the decks outer rim. We want as much surface area contact between the tail and the deck’s rim joist as possible. This will ensure we have maximum durability.
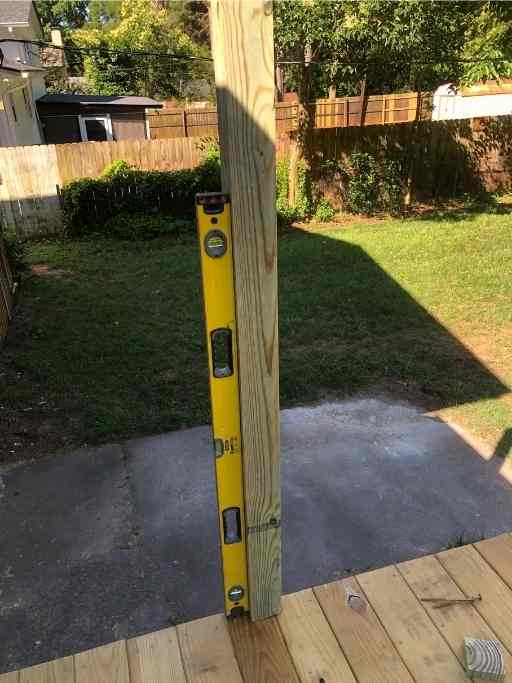
Setting the post should ideally be done with two people. One person needs to keep the post level and plum, making sure the post does not lean away or inward, and sits completely upright. This person should be holding the post still with a level held against the post. Person 2 should be on the side of the deck ready to install the lag screws.
Lag screws will require a hammer drill, and may need to have a small hole pre-drilled to ensure a good pathway for the lag screw.
The size of the lag screw varies by deck construction, but should ideally be long enough to pierce the post, and the rim joist of the deck. I like the lag screw to be long enough to peirce all of this wood completely, and have a little bit of excess screw hanging out, this can be chopped off later. I will provide a picture to give a better understanding of this.
Repeat this process for every post that needs to be set.
Tip – if you’re confident, put some exterior construction adhesive on the inside of the post tail. This will give it that little bit of extra security and structural integrity. Some will ooze out when the post is facined to the deck, so wipe this off with a wet rag before it dries.
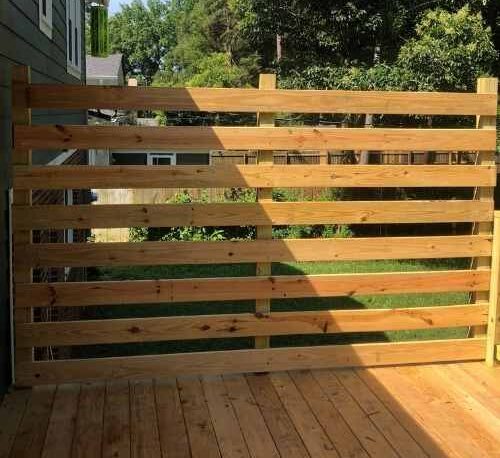
5. Attach the Blind Material
This final step is completely up to you as to how/what you want this to look like. You can attach whatever material you want to the posts. You can have a solid panel of wood for a complete blind, a trellis for a decorative plant to interweave, or whatever else you can come up with
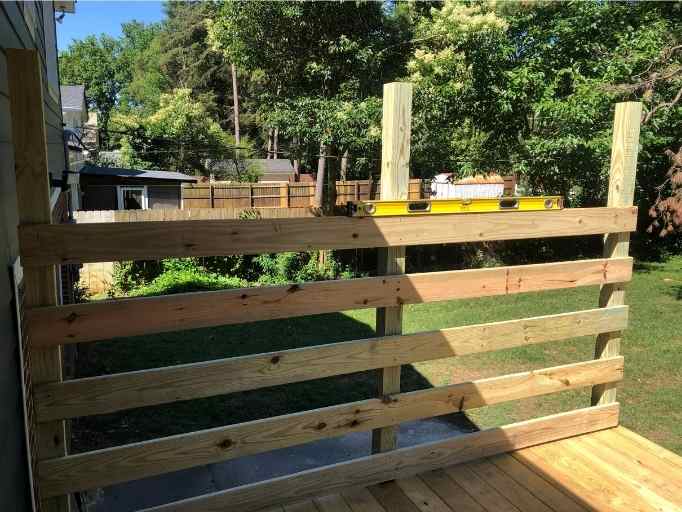
I used extra deck boards cut to size for this, attaching them to both sides, slightly overlapping each other to provide a little (texture?) to the project. I liked this style because it allowed some airflow, but still provided good privacy.

If you’re using a solid panel, one thing to think about is wind gusts. If you’re in an area that is subject to extremely high wind gusts, you may want to use a material that allows some airflow. This is because a solid panel will act like a sail, and put maximum strain on your deck where the posts meet the rim joist.
You’re Done!
Now you can finally relax without having to worry about those peeping eyes from the next house over. Hang out naked on your deck, it’s your property, and you have a solid privacy fence – you deserve it!
Total Project cost
Around $100 on the high side (inflation)
If youre unsure of what to use as your blind material, there are a plethora of ideas on pinterest. Look around and find one that feels right and fits your needs
I sincerely hope this tutorial helps you in your quest for privacy. As always, if you have any questions comments or want to tell me to go fuck myself, contact me!

Max
Max Lowrie, founder of MySplitLevel.com® and author of The Live In Flip© bought his first split level house in 2016. During a lengthy renovation, Max noticed that there was little useful content online specific to split-level homes. Max now devotes his time to share his knowledge hoping to help homeowners avoid unnecessary mistakes, and provide a blue print for split-level owners nationwide.
Giveaways, Ebook, and Forum coming soon. Be the first to know about new content!