Unless you’re moving into a brand new home, chances are you’re faced with a bathroom that’s smaller than you’d like. If you own a split-level home or any house from the 1960’s I can guarantee you have this problem.
For some reason, mid-century bathrooms were built for garden gnomes, and unless you have the money to completely rearrange the walls, you’re stuck with the space you’re given and that’s okay!
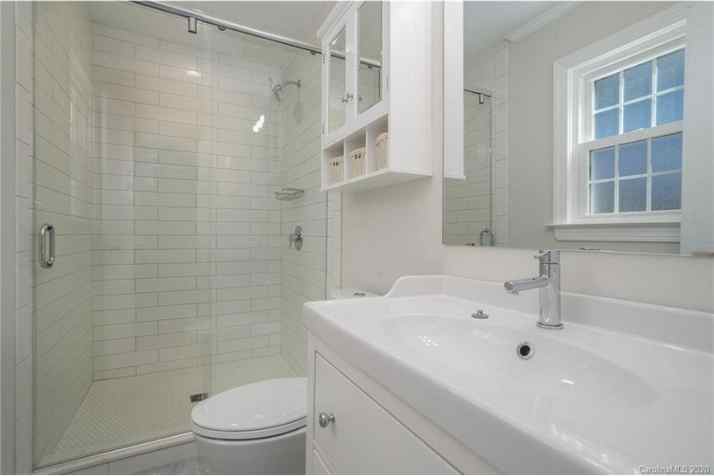
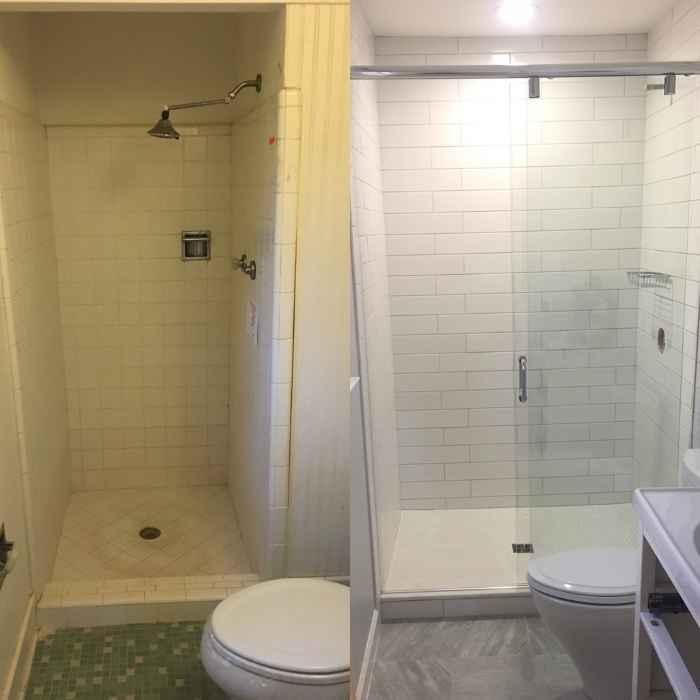
In my split-level home, I was faced with two 5×8 bathrooms (full baths, including a shower) which is about as small as humanly possible. In this article, I’ll go over how I make the most of a small bathroom, and how I save money doing it.
Layout & Maximizing space
The layout is the most important part, and planning can make or break the feel of your small bathroom. The good news is it’s probably pretty simple.
When it comes to vanities and toilets, certain varieties are built for small spaces, and I’m sure there’s one that will fit the space you have.
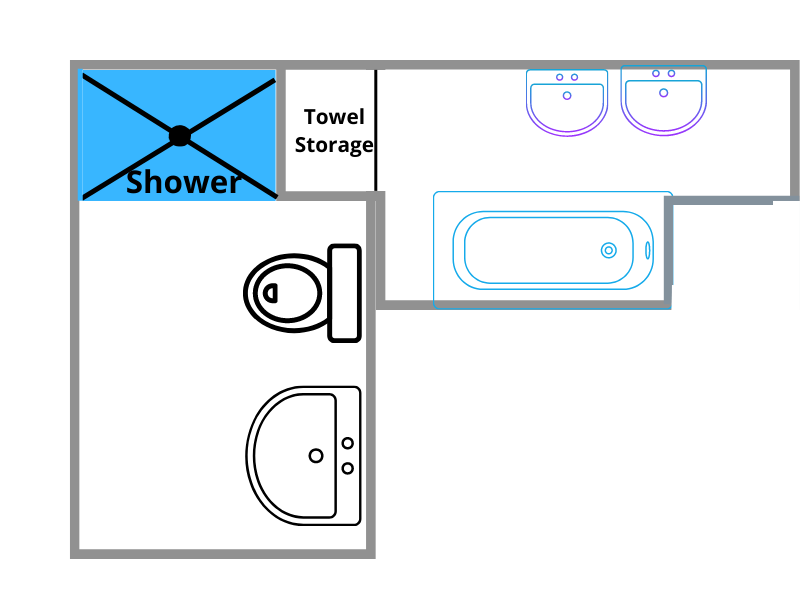
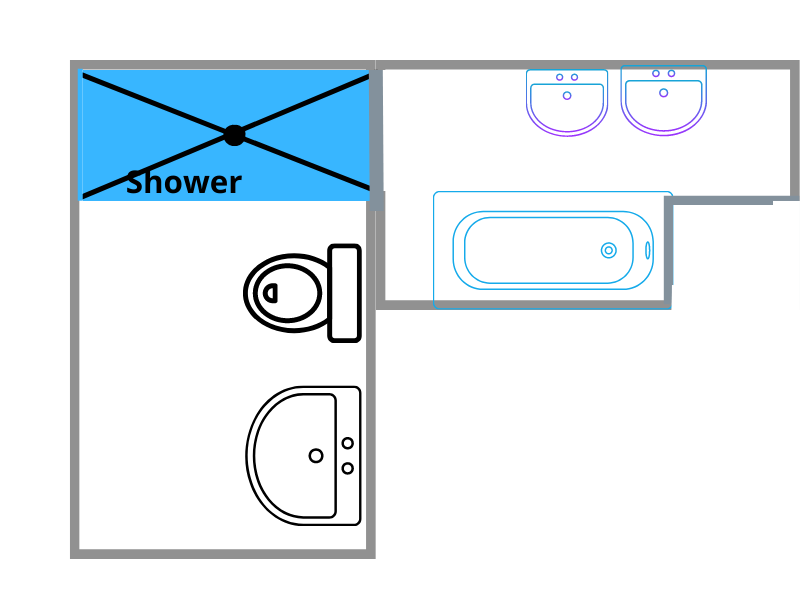
For me, my biggest issue was the small space between the door, over the sink plumbing. The depth of the vanity had to be very small so as not to impinge on your hip when you walked through the door.
The door itself is also an issue. When I redid this bathroom I didn’t know any better, and I used a regular hung door that swings inward. I lost a lot of space this way. There were points where I needed the door to be closed so that I could open the vanity drawers.
If I had to do it all over again, I would look into a sliding barn door or a pocket door. Utilizing pocket doors can be a lifesaver when trying to save space. They just require a bit more work to install. Unless you’re very handy I would see about having one professionally installed.
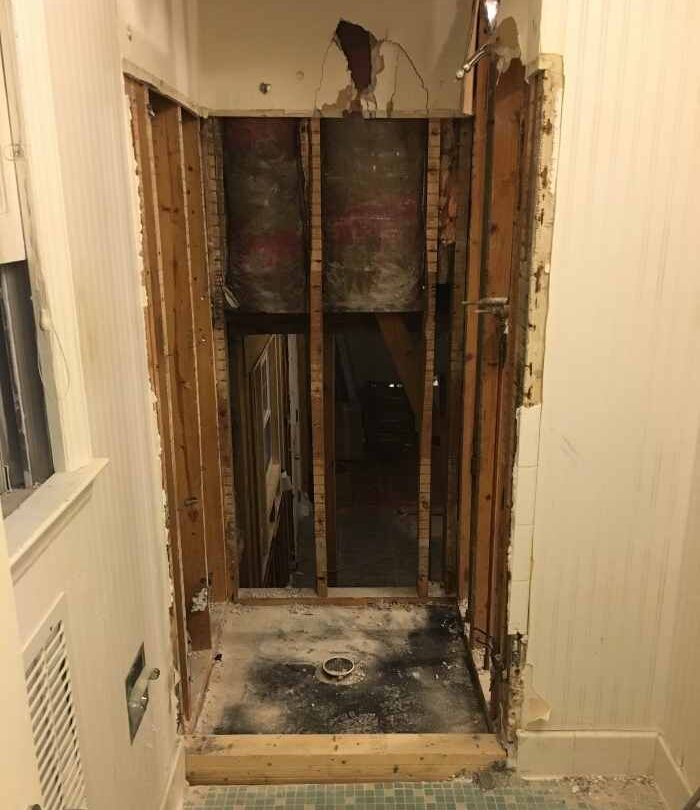
The Shower
Almost without fail, the shower needs to be on the back wall. To have a walk-in shower with shoulder room, the back wall is where it’s at.
In the bathroom shown, I put the walk-in shower along the back wall, giving it plenty of space in contrast to the small shower that it replaced. This required some re-framing of the walls to flush it out, and it worked out wonderfully.
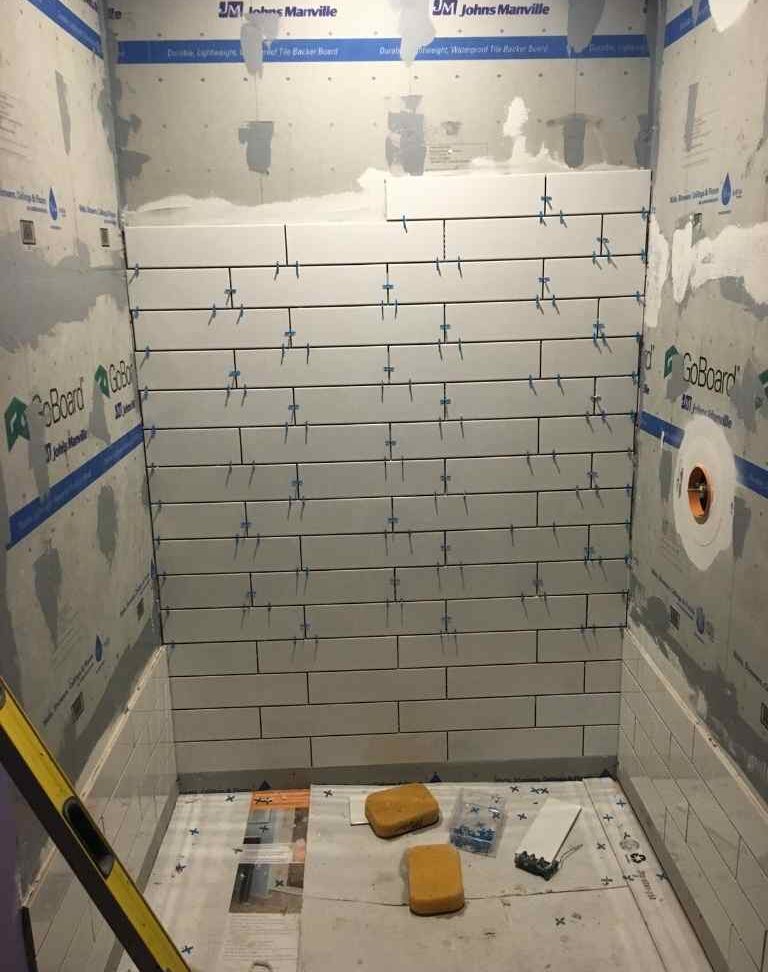
If the thought of setting tile DIY scares you, don’t let it. There are plenty of resources available to you on youtube that will make you an absolute master at setting tile. My favorites are Sal Diblasi and Stud Pack
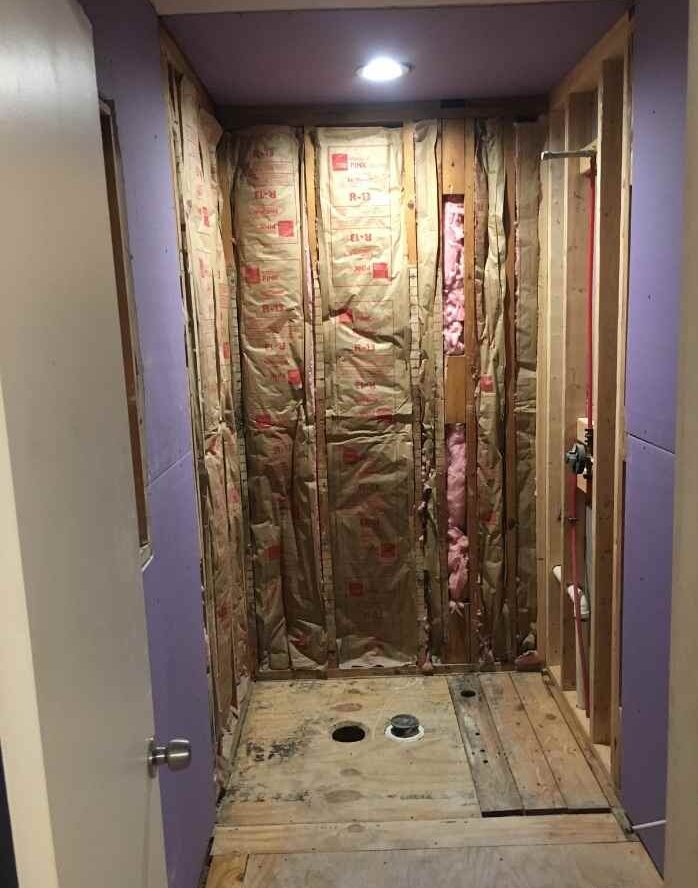
And please, save yourself and your back, DO NOT use durock. For some reason every DIY bathroom remodel involves durock. I have nothing against durock for showers, it had its time and place in the 1980s, but there is no need to lug those heavy, cumbersome sheets of crumbling, porous rock up to your new bathroom. The Schluter/Kerdi system is the way to go.
This shower kit works for a typical shower where the drain is at the front of the space (most likely a tub conversion). There are other kits available for different drain locations.

With Schluter, you’ll use lightweight waterproof foam boards and accessories as the backer for your tile. This is the way to go. There are other brands like goboard and wedi board, but the Schluter system is the easiest to find.
Niches are your friend
To make the best use of the space in the shower it’s a good idea to utilize shower niches. A shower niche is a shelf that lays inside the cavity of the shower wall, so as to not impinge on the showerer(?).
This niche fits perfectly into a schluter shower kit. The grid pattern on the niche and kit make precise placement a breeze.

It lets you keep the space in the shower, and not have to set soap and other accessories on the floor. Shower niches are key in small bathrooms because it utilizes space that otherwise would be wasted. Preformed shower niches are available and recommended with the Schluter Kerdi system.

Giveaways, Ebook, and Forum coming soon. Be the first to know about new content!
Heated Floors? Yes Please!
This Ditra heat kit includes everything you need to have heated tile floor underlayment. Just follow the instructions on the Schluter Youtube page.

If this is going to be a grand, master bathroom (emphasis on master). It’s worth looking into heated floors. I know floor heat sounds like an absolute luxury, but it cost just a little bit more than cold tile. Especially when you consider the extra ‘pop’ saying “heated floors” will give your house listing when it comes time to sell.
If you’re not familiar with tile, installing floor heat may need to be done professionally. However, there are also plenty of youtube videos going over the installation of floor heat with the Schluter system in depth.
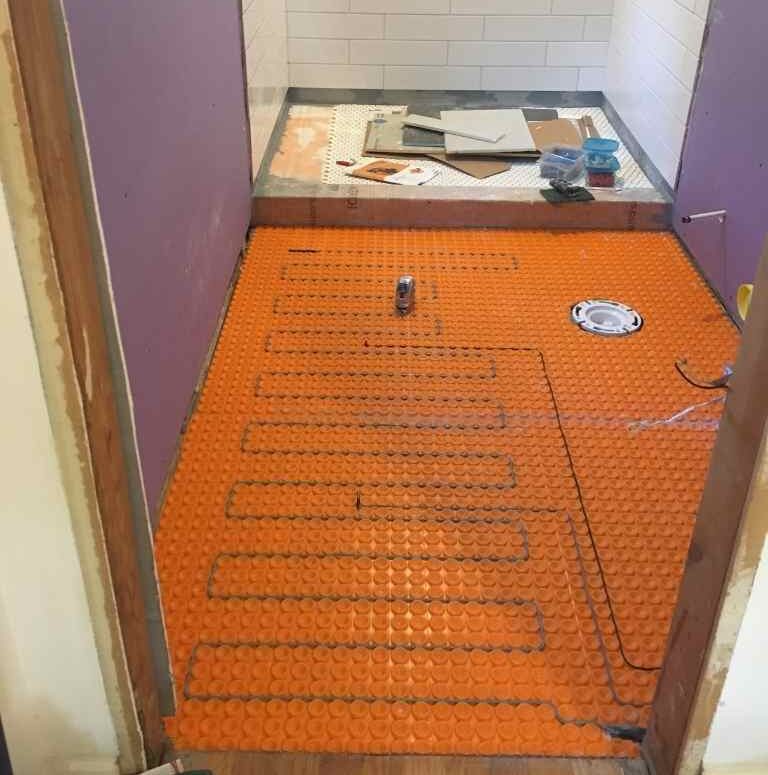
I used Ditra Heat (Schluter) for my small 5×8 bathroom, which turned out wonderfully. A heated cable is run from the thermostat, and locked into the membrane that sets underneath the tile. The thermostat can be programmed to start heating before even waking up. Here’s a picture of the installation.
Choosing a Tile
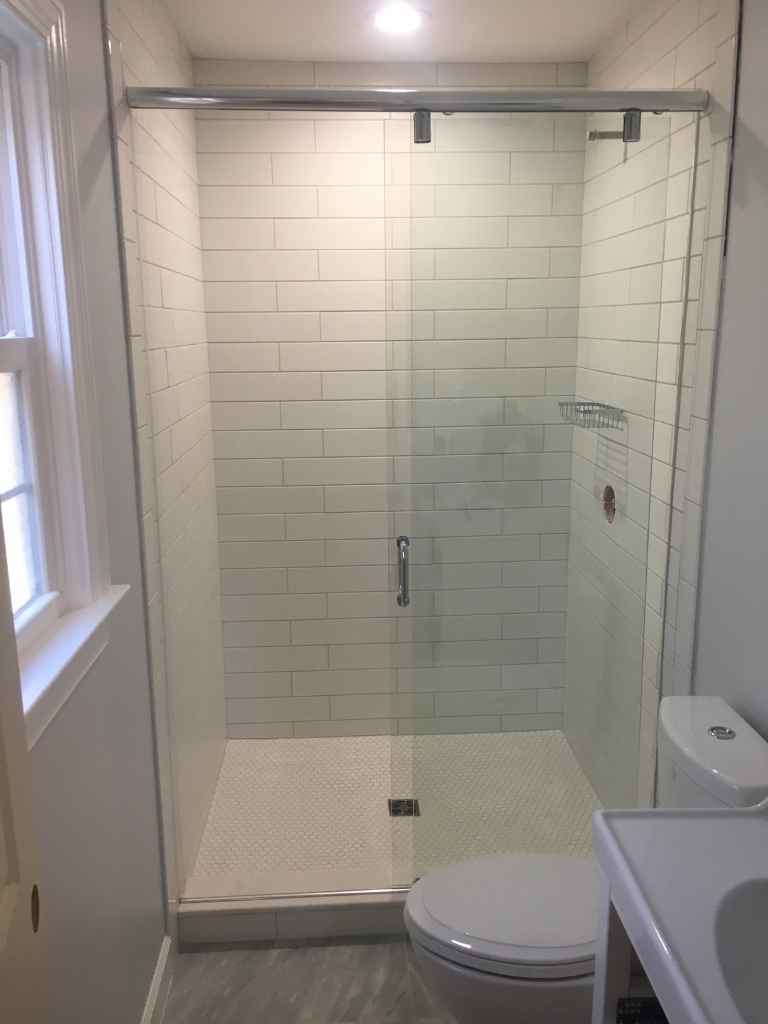
I was told making the space as bright as possible gives a small bathroom a larger feel. As you can see I took this to heart and created a bathroom that required you to squint once the lights came on.
As far as tile cost, I chose some expensive Carrara marble floor tiles. Because of the lack of space, I didn’t have to buy many. The shower tiles were white ceramic and near the bottom end of the price sheet.
Consider pattern
If you don’t have the money for a pricey tile, pay attention. During my bathroom renovation, I discovered that setting the tile in a unique pattern would overcome the lack of luster in the tile itself.
Setting the tile in a unique pattern gives it the wow factor sometimes more than showing off an expensive tile. This is another area where Pinterest is your best friend.
Lighting
This is an important step in this whole small bathroom thing. For a bathroom, this small, usually a set of lights over the vanity, and one over the shower will do. The light over the shower needs to happen, this will make or break the bathroom for a few reasons.
1. It’s nice to have light in the shower.
2. When you spend money to construct a nice shower, it should be highlighted appropriately.
Think of it like a piece of artwork at a museum. The light over the shower needs to happen. If you don’t have ventilation in the bathroom, one way to do this is to install a recessed light/vent fan combo above the shower.
How much does it cost to remodel a 5×8 bathroom?
A 5X8 bathroom can be redone entirely DIY for $1500-$2,000. If you need to hire out certain aspects of the job, the price will increase exponentially.
What If I can’t afford it?
If you can’t afford to update an old bathroom, one cost-effective measure is to reglaze the tile. Have a company like this one come to put a better finish on your old tile. I’m out of options for you.
In Closing
Updating a small 5×8 bathroom can be challenging. However, the lessons you learn while updating your small bathroom will be invaluable for the next project you take on. As with any of my tutorials, planning is key. Measure 3 times and become comfortable with using a tile saw before you start setting tiles down.

Max
Max Lowrie, founder of MySplitLevel.com® and author of The Live In Flip© bought his first split level house in 2016. During a lengthy renovation, Max noticed that there was little useful content online specific to split-level homes. Max now devotes his time to share his knowledge hoping to help homeowners avoid unnecessary mistakes, and provide a blue print for split-level owners nationwide.
Giveaways, Ebook, and Forum coming soon. Be the first to know about new content!